Fava bean and pea crostini

I don’t know when it started, but in the past few years, my good friend Jennifer has become obsessed with horse racing. Her unbridled enthusiasm has gotten our entire group of friends interested as well. Such is the beauty of a well-tended obsession. She recently had a Belmont-watching party, and I must say, watching American Pharoah win the Triple Crown – the first horse to do so in 37 years – was surprisingly emotional and stupendously thrilling. 

I wanted to take an appetizer capitalizing on what was ready to harvest in my garden and an adaptation of Jaime Oliver’s “Incredible smashed peas and fava beans on toast” was just the thing. I love Jaime Oliver. He’s so enthusiastic and accessible. Not to mention adorable. I love all his cookbooks, but I especially love Jaime at Home. It’s seasonally based around his amazing kitchen garden and is full of beautiful photos and growing information. There’s a show too. It’s like the cookbook come to life. I can’t get enough.

I bought a baguette, some lemons, and some parmesan. And while I was at the farmer’s market, I picked up some gorgeous fromage blanc from White River Creamery (http://www.whiterivercreamery.com).

Then I harvested peas and fava beans. 

IMG_8382

IMG_8407

I would be lost without those little scissors. I use them to harvest almost everything. Favas, peas, beans, peppers, tomatoes, herbs. There are few things more frustrating than ripping off an entire stem when you only meant to get a pepper. Plus a clean cut is important because it leaves less of an entrance for diseases to enter. I also just like scissors in general. I find them the perfect embodiment of form and function. I think these babies are particularly attractive. Photogenic too. I picked them up at Pearl River Mart in New York (http://www.pearlriver.com) with no idea they would serve such a purpose in my life. I also like this basket for harvesting. When it’s cooler I use a big stainless steel bowl, but once it starts to get hot, they heat up so quickly that they’re no friend to tender legumes and leaves.

Watch your back. This guy is notorious.

IMG_8404

I also harvested some radishes and mint.

IMG_8217

There’s always an opportunity for a moment of zen when you’re shelling legumes. So even though time was ticking to make it to the party, and I was documenting, I tried to take it.

IMG_8238

Once your beans and peas are shucked, put some of the raw peas, a few mint leaves, and some salt in a mortar and pestle.

IMG_8261

And, as Jaime would say, bash ’em up!

I must admit, I don’t have the right mortar and pestle. I tried both of mine. And while I love them both as objects, what I really need is one of those molcajetes that they make quacamole in. Something with a little more grit. It all worked out eventually, but I did break a sweat.

When you get a nice mash working, start to add your fava beans. Jaime used his raw, but I blanched and peeled mine. Once everything is good and pulverized, add some olive oil to make it creamy, plus some parmesan to ground all that freshness. And then kick it into gear with some lemon juice. Keep tasting until you have the perfect balance of bright creamy salty freshness.

IMG_8266

Now you may not have fava beans hanging out in your garden waiting for you to fulfill their destiny, but this next bit is a keeper. Crostini. “Little toasts.” They are a cinch to make and are the perfect vector for truly endless numbers of toppings. Slice a baguette thinly, brush with olive oil (a little brush for olive oil is a really handy tool to have around), sprinkle with salt and pepper, and pop in a 350º oven for 15-20 mins. Voila! They only challenging part is getting them golden brown without burning them. I was feeling fancy, so I smashed a garlic clove and gently rubbed it on mine. I broke a couple, so I had to be extra gentle. But then I had testers.

IMG_8244

I made a little salad with julienned radishes, pea shoots, lemon juice, olive oil, and salt.

Then, to assemble, I spread a little fromage blanc on each crostini, put some of my lovely green mash on, and topped them with the radish salad.

IMG_8269 (1)

I needed something for the middle of the plate, so I tossed arugula, pea shoots, a bit of mint, and some fava bean shoots with olive oil and lemon juice, tossed on the few remaining radishes, grated some parmesan and lemon zest on top, grabbed a bottle of wine out of the fridge and raced to Jennifer’s. Luckily she lives about two minutes away, so I just took the platters as they were.

IMG_8275

Thanks for the party Jennifer! And Congratulations American Pharoah!!!!!!!

BROCCOLI RABE

IMG_7813

I love vegetables in general, but for whatever reason, I love Broccoli Rabe the best. Something about that bitter turnipy bite is like a tonic to me. It flavor has a wild spiciness about it that I crave. And I always feel virtuous and powerful when I eat my greens. It’s Italianness helps too. Italians just seem to know how to enjoy life. And how to eat. I like to align myself with those qualities. My favorite dish, my last meal, would have to be the Southern Italian classic orechiette with sausage and broccoli raab. I can’t really explain it. It’s just the dish that hits all my notes. Spicy, bitter, sausage, greens, pasta, parmesan. I don’t even know how I came across it in the first place. I know my friend (and ex-boyfriend), the famous Matthew Posey, used to think it was called “Barclay Rob”, which still makes me laugh, so I know it’s been at least ten years. And I know my dear friend Laura and I enjoyed it together while I was living on Hoboken, one of the moons of Italy. But that first experience is lost to me.

Broccoli rabe (Brassica rapa subspecies rapa), is believed to have originated in China as well as the Mediterranean. It is known by many names. Some of its other aliases include rapini, broccoli raab, rapi, cime, friariélli, broccoletti, and cimi di rapa (which translates to “turnip tops”). It is in the Brassicaceae or mustard family. It is a leafy green vegetable that forms buds that resemble broccoli, but unlike broccoli the buds don’t become heads. It is actually more closely related to the turnip, which I think you can taste. Bitterness is its signature and it’s popular in Italian, Spanish, Portuguese, and Asian cuisines. 

And incidentally, it’s incredibly good for you.

Its loaded with Vitamin K-which gets it’s name from the German word for blood clotting (kloagulation), who knew? Vitamin K is believed to reduce the risk of atherosclerosis by directing dietary calcium into bones and thus preventing its build-up in the arteries. That also makes Vitamin K crucial for bone health, which is increasingly important as we age.

Broccoli rabe is also a great source of Vitamins A and C, as well as fiber, calcium, folate, iron and manganese. It turns out that bitter foods promote digestion by hitting receptors in your tongue that stimulate the stomach to produce gastric acid. And the better your food is digested, the more nutrition you derive from it. We Americans don’t eat a lot of bitter food. We lean more towards salty and sweet. But once again, diversity is key. Chinese medicine treats liver ailments with bitter herbs and foods. And since the liver plays important roles in circulation, excretion, metabolism, detoxification, and the regulation of hormones it behooves us to keep it healthy.

So eat broccoli rabe, it will make you feel great!

Broccoli rabe can be hard to find in Fayetteville, Arkansas, (which might be another reason I like it, anytime I get to eat it is a special occasion) but it’s not hard to grow your own. Plus, it’s an early and fast crop and the sooner I can be eating from my garden, the happier I am.  Supposedly, you can even plant them late in the season, after a hard freeze. The seeds will wait out the winter and you’ll get an early crop the following spring. I’ll definitely be trying that this winter. 

This year I grew two kinds, Spring Raab, whose seeds I got from from High Mowing Organic Seeds (http://www.highmowingseeds.com) and Quarantina Cimi di Rapa from Seeds from Italy (http://www.growitalian.com). The name quarantina signifies that it’s ready in forty days. I sowed a row of each on March 21st and was eating them both by the end of April. The seeds are typical of the mustard family – small, dark, and perfectly round. They need only be pressed into the surface of the soil and watered in well. Once they sprout you can thin them out and eat the thinnings as micro-greens.

IMG_7446

In the photo above it’s the last two rows, those at the very top of the photo. This was taken on April 15th.

IMG_7455

IMG_7726

IMG_7811 (1)

There are two rows in the photo above, the one on the left is Spring Broccoli Raab, the other is Quarantina. I’ve found that Spring has larger leaves and is much slower to make buds, in fact as of now, it still hasn’t. But the leaves are big and delicious. Quarantina was slower to come along, but it makes buds much sooner. This is good, because the buds are tasty, but you have to be quick, because once they’ve formed buds they bolt or make flowers really quickly. Go ahead and eat those too! I bet they’d be great tempura style. If I had to choose, I’d probably go with Spring, at least for spring. Perhaps Quarantina will come into her own during a fall planting.

They haven’t been too bothered by insects, but they are right next to that bug-magnet cauliflower, so we’ll see how they fare. I shoulda/coulda/woulda put my floating row cover on a month ago, but I was too enamored with being able to see everything grow. My neighbors use lightweight tulle on their leaf crops, you can see through it which is really nice. I’m going to look into a supply of my own…

One of the simplest and best ways to enjoy Broccoli Rabe is simply sauteed with garlic. Some recipes suggest blanching it before cooking, to curb the bitterness. I’ve never felt the need to do this, but maybe I’ll give it a try. It’s bitter flavor also works well with anchovies, oil cured black olives, walnuts, potatoes, white beans, mozzeralla, sun-dried tomatoes, or a fried egg, to name a few. It’s also a great pizza topping. 

The classic broccoli rabe dish would have to be with orechiette pasta and sausage.

Orechiette, which means “little ears” is a small, round, flattened pasta from Apulia, Italy, the heel of the boot. It’s one of my favorites. The bite-sized pasta neatly captures ingredients like a pea or a morsel of sausage. (It’s hard to take a good photo period, but taking a good photo of sausage is for the real pros.)

IMG_7874

Orechiette with Sausage and Broccoli Rabe

  • Servings: 1
  • Difficulty: easy
  • Print

1 cup orechiette pasta

2-3 cloves garlic, thinly sliced

1-2 red serrano peppers, minced, or you could use red pepper flakes, or skip it all together

1 link Italian sausage (I like it spicy, but sweet is good too, and a nice complement to the rabe’s bitterness)

2 big handfuls of broccoli rabe, chopped (stems separated and chopped)

Parmesan cheese

Kosher salt

Freshly ground black pepper

Optional toppings: fresh lemon juice, toasted bread crumbs

Start a saucepan of water for your pasta. I use a cup of pasta per person.

Heat a splash of olive oil in a cast-iron skillet over low heat. Add the sliced garlic and chopped pepper and sauté until the garlic turns a nice golden color. (I sometimes throw in an anchovy here too, but I’m crazy like that.) Squeeze the sausage out of its casing into the skillet and use a wooden spoon to break it up into smaller pieces.

When almost all the pink is gone from the sausage add the broccoli rabe stems. Give them a couple of minutes head start and then add the chopped rabe leaves. You might need to do this in a couple of batches. Sprinkle with salt and several grindings of fresh pepper. When you add the leaves to the skillet, add the pasta and a teaspoon or two of salt to the now boiling water.

Continue to sauté the broccoli rabe until it is wilted to your liking. If this happens before your pasta is ready, turn off the heat and let sit until the pasta is ready. When the pasta is cooked the way you like it, pour off a half a cup or so of the pasta water and set aside before draining the pasta.

Place the pasta back in the saucepan, add the broccoli rabe and sausage mixture, some of the reserved pasta water, and a bit of grated parmesan.  Stir until it’s moist and integrated, adding more pasta water if necessary.

Serve immediately with parmesan, black pepper, and a drizzle of olive oil. And maybe a squeeze of lemon to kick it into gear. Or some toasted bread crumbs.

For a vegetarian option, I’ll substitute oil-cured black olives for the sausage.

IMG_7926

IMG_7954

Buon Appetito!

HARICOTS TARBAIS and CASSOULET

Brace yourselves this is a long one, (but there are lots of pictures).

Growing your own food is elemental.  To place a seed in the ground, nurture it, and watch it grow into something that can sustain you is to participate in a miracle on the deepest level.  It is an act that ties you to the seasons and to the earth.  Homegrown organic vegetables not only taste better than conventionally grown store bought ones, they are better for you too.  Yet as poetic as the desire to grow your own can be, it can stem from practical concerns as well.  Some vegetables are expensive.  Others are next to impossible to find.

Take the French white bean ‘Haricot Tarbais’. 

IMG_3510

This creamy white, thin-skinned, low-starch bean is said to be the soul of the classic French peasant dish cassoulet.  Cassoulet is a hearty, meaty, quintessentially winter dish, originating in southwestern France.  A forerunner to that classic American pairing Pork and Beans, if you will.  It is named after the cassole, the vessel in which it is traditionally cooked.  A cassole is a deep, round, covered casserole dish, shaped much like a short, fat flower pot.  The beans are cooked for hours, sometimes under a crust of breadcrumbs, with a variety of available meats, often including duck confit, sausage, and ham.  Cassoulet is one of those regional dishes, like American barbeque, that people have very strong opinions about.  The few cassoulets I’ve had in my life have been at French restaurants in Manhattan, and as different as they were, they were each an experience.  Eating cassoulet takes me somewhere.  Somewhere rustic and French and cold.  Austere but gorgeous and welcoming.  When I saw ‘Haricots Tarbais’ seeds offered in the Baker Creek Heirloom Seed catalog two years ago, I knew not only that I had to take that trip, but that eventually this day would come and I’d be making my own cassoulet.

IMG_3507

I have worked at my share of restaurants (I was an actor in a former life).  From LA to NYC, I have been exposed to cuisines from all over the world prepared by talented, passionate, inspiring chefs.  It’s made me an ambitious, if not proficient, home cook.  Having my own vegetable garden to draw from has taken that, in the parlance of our times, to a whole nother level.  It allows me to grow a crop with a particular dish in mind.  I find this especially thrilling.  True satisfaction can be hard to come by these days, but sharing with friends my first cassoulet from beans that I grew myself was the essence of satisfaction.

IMG_6249

GROWING BEANS

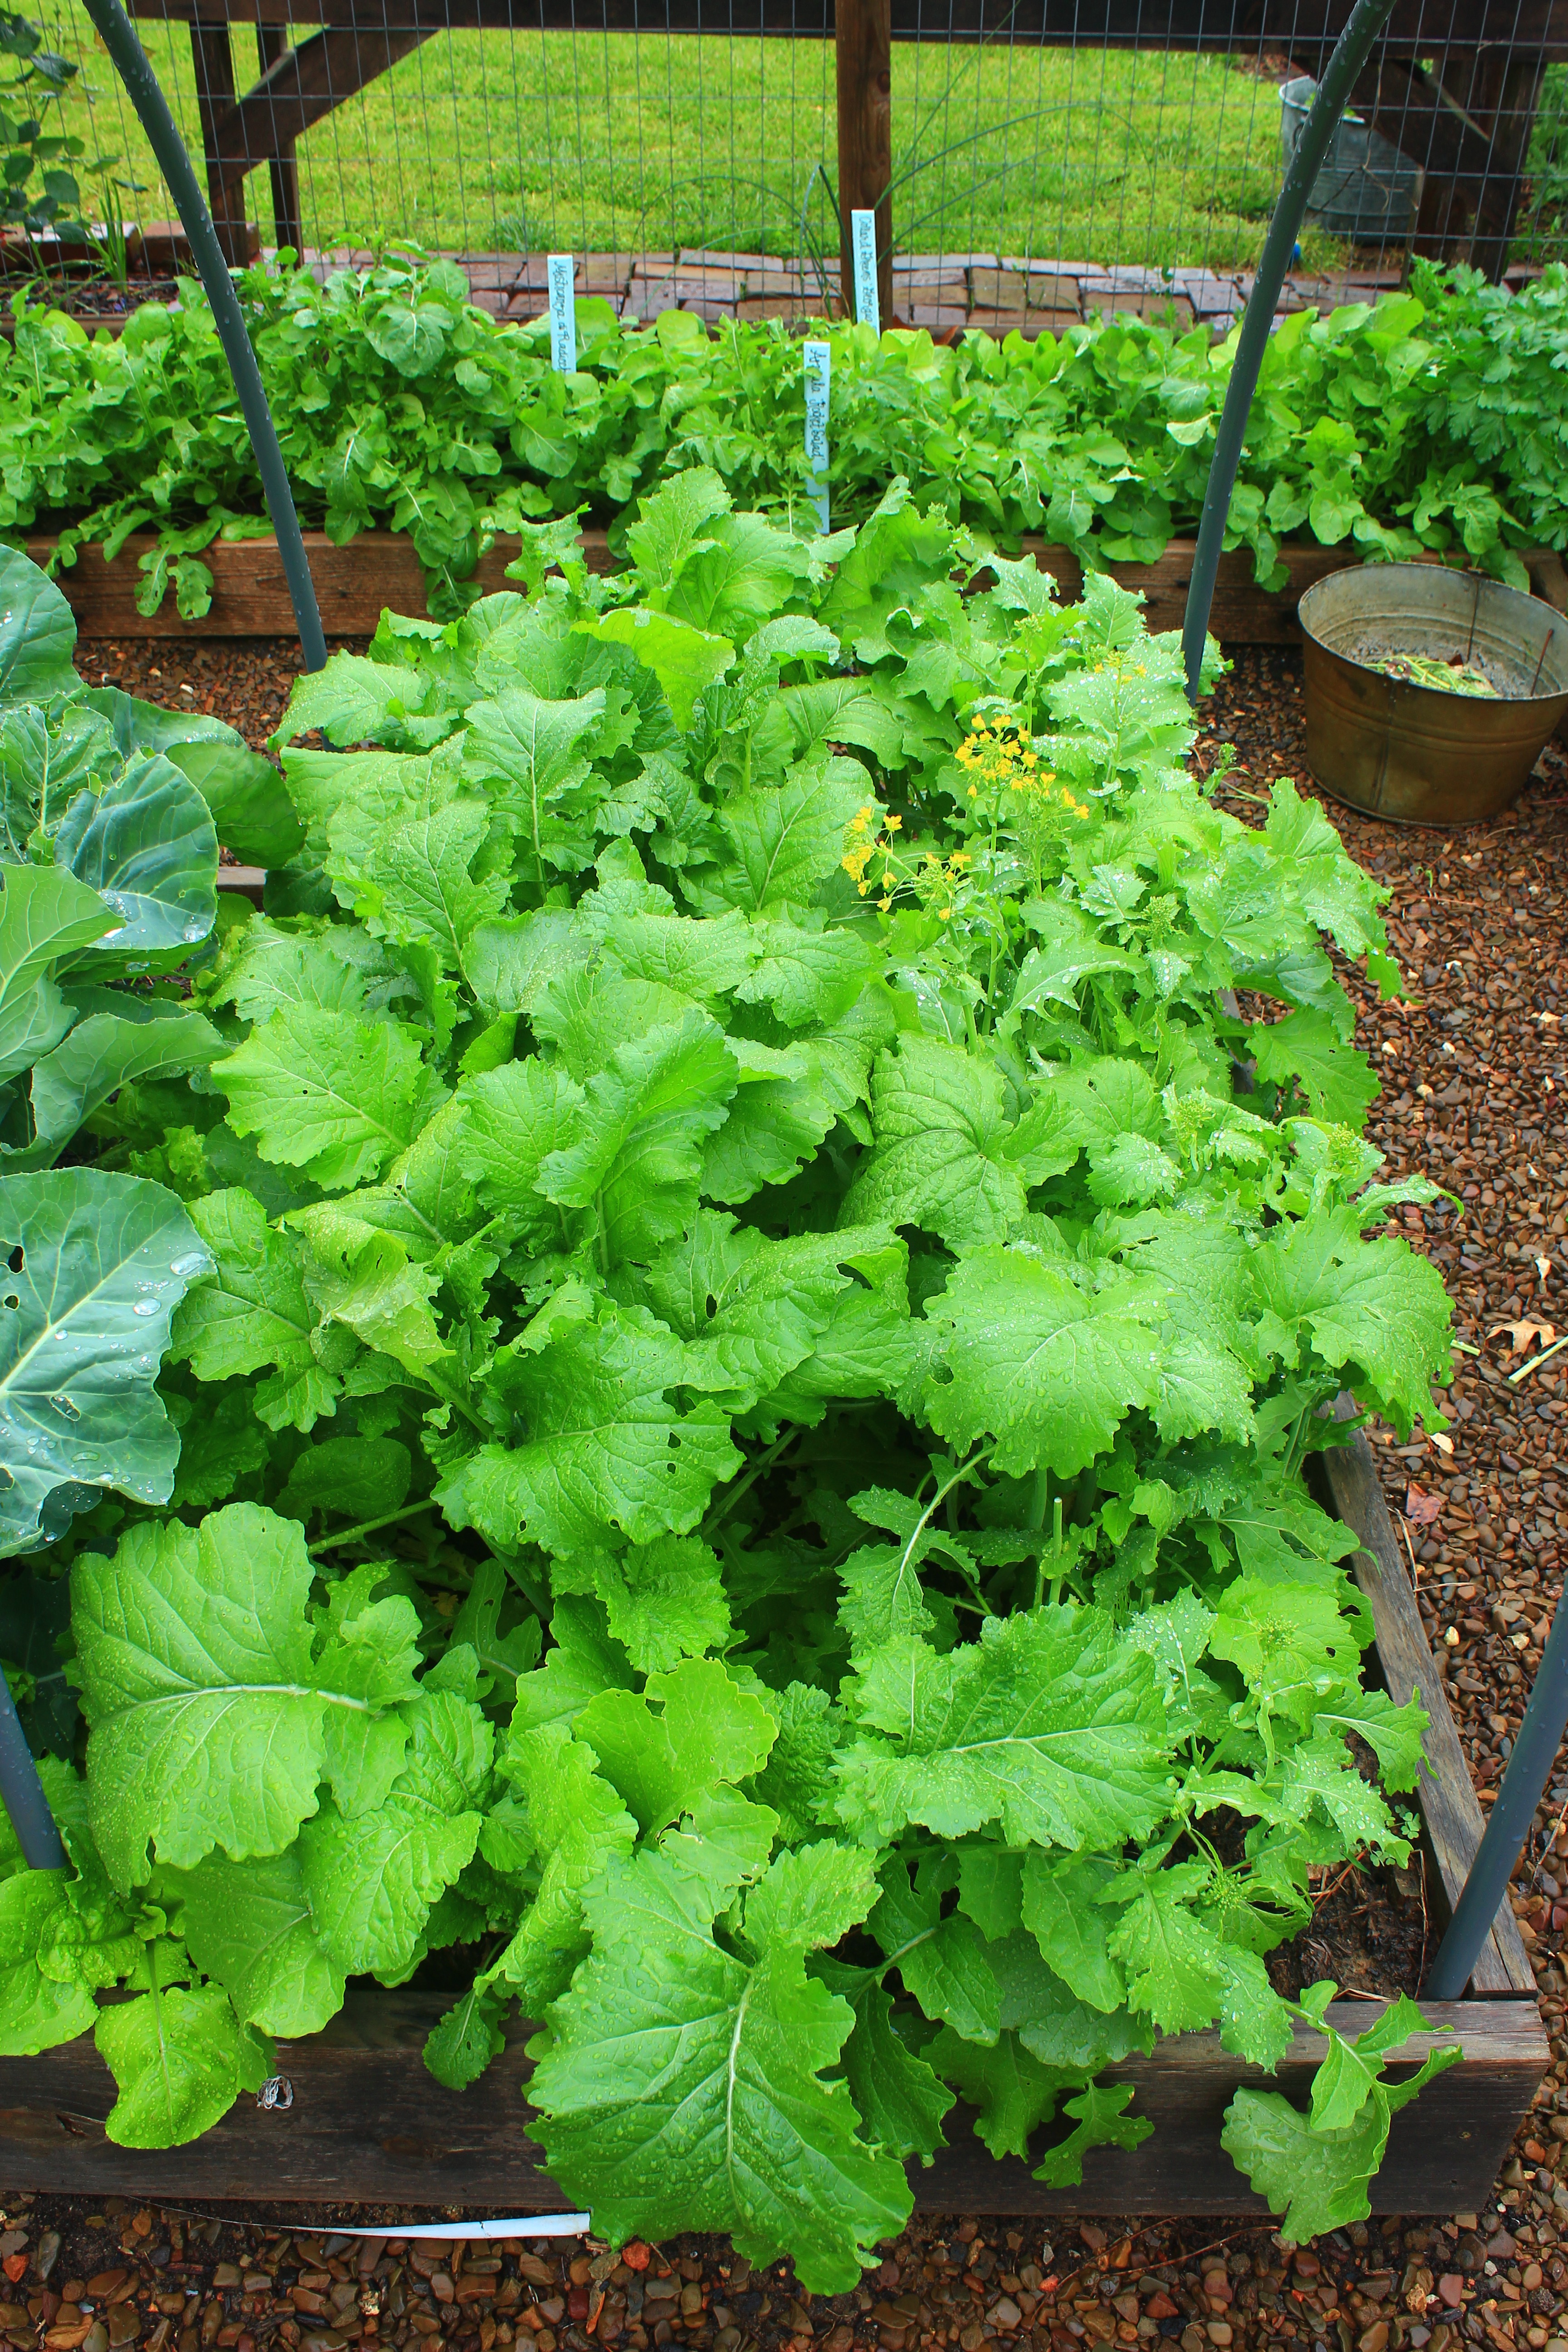
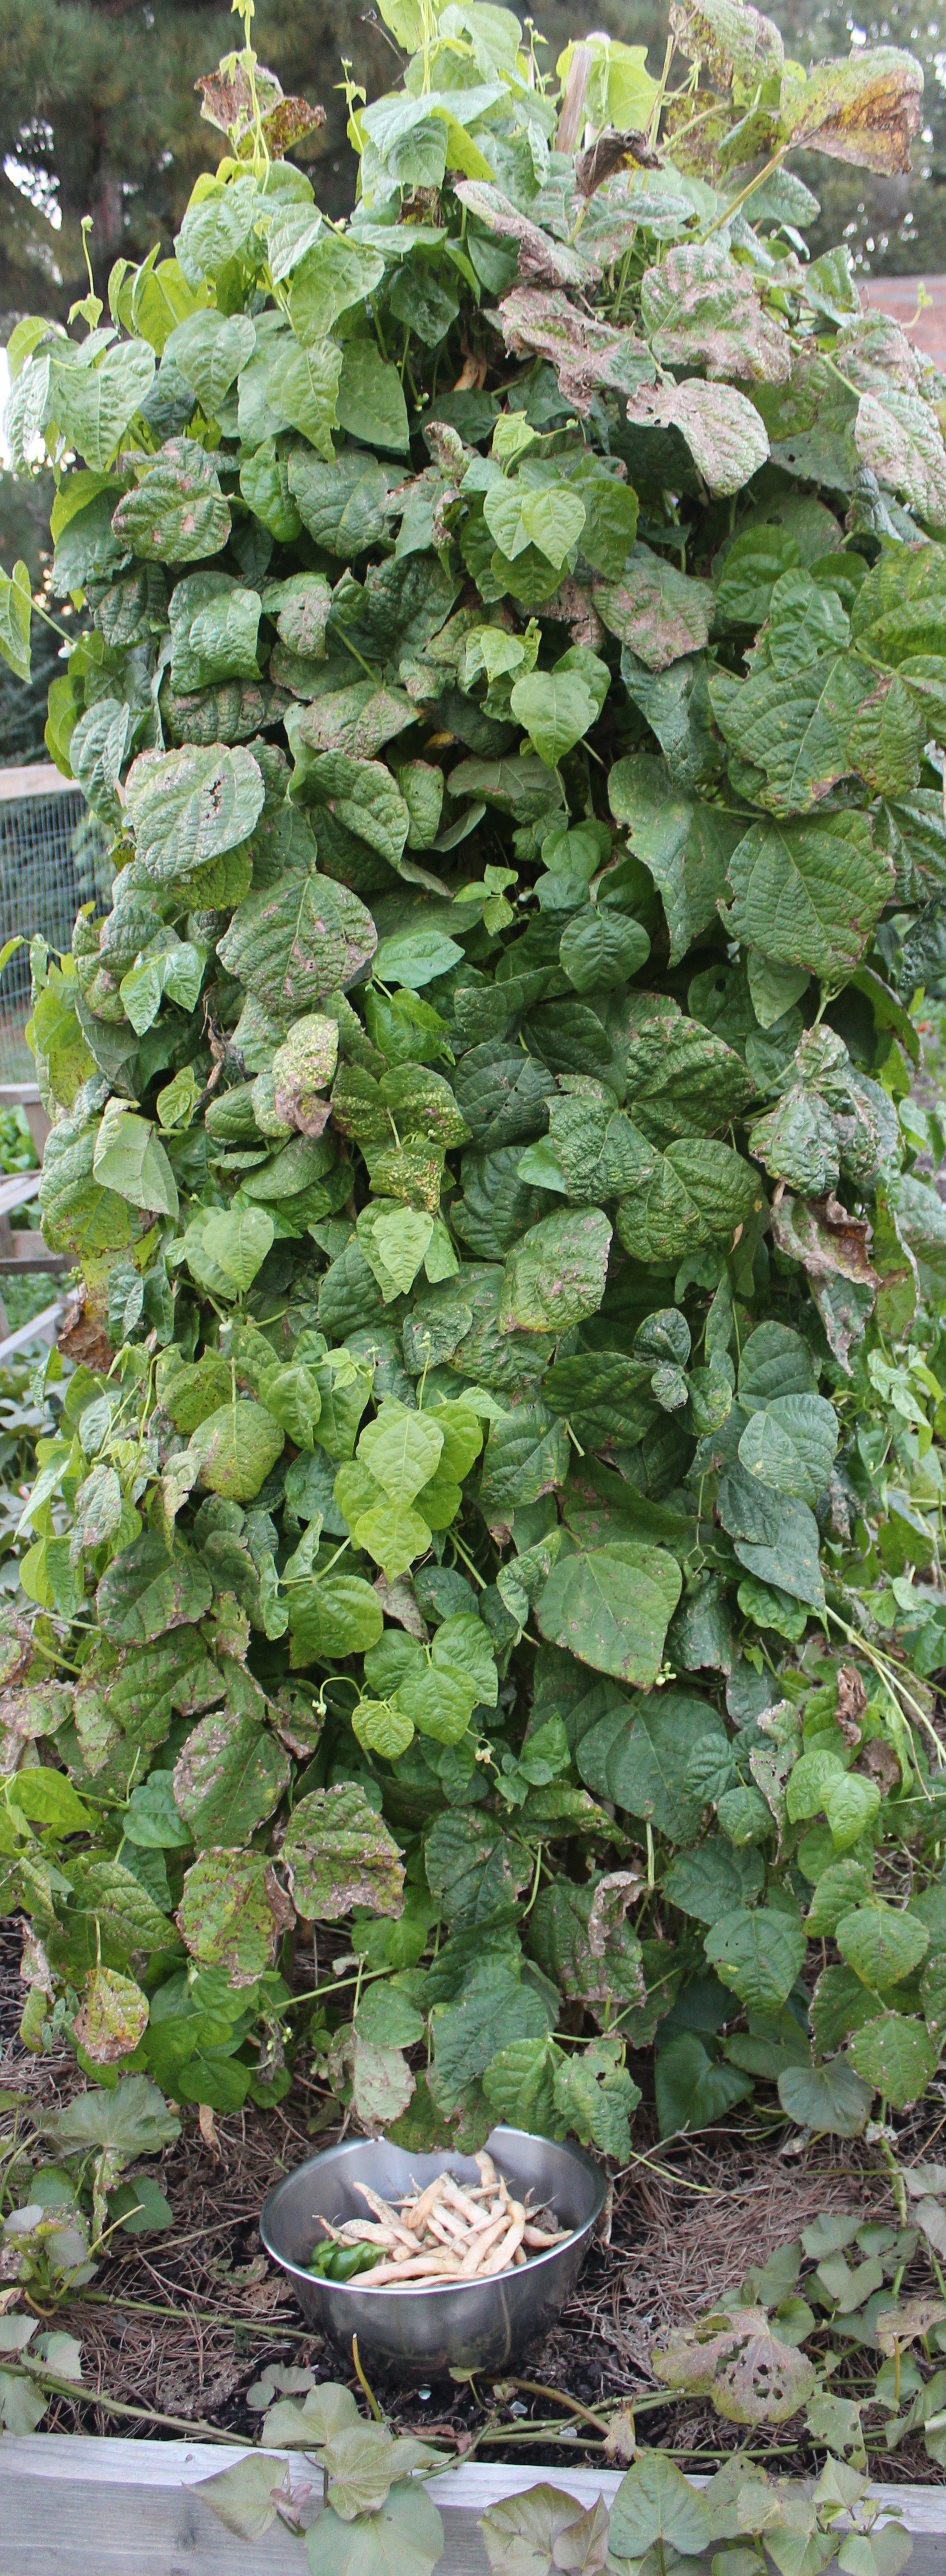
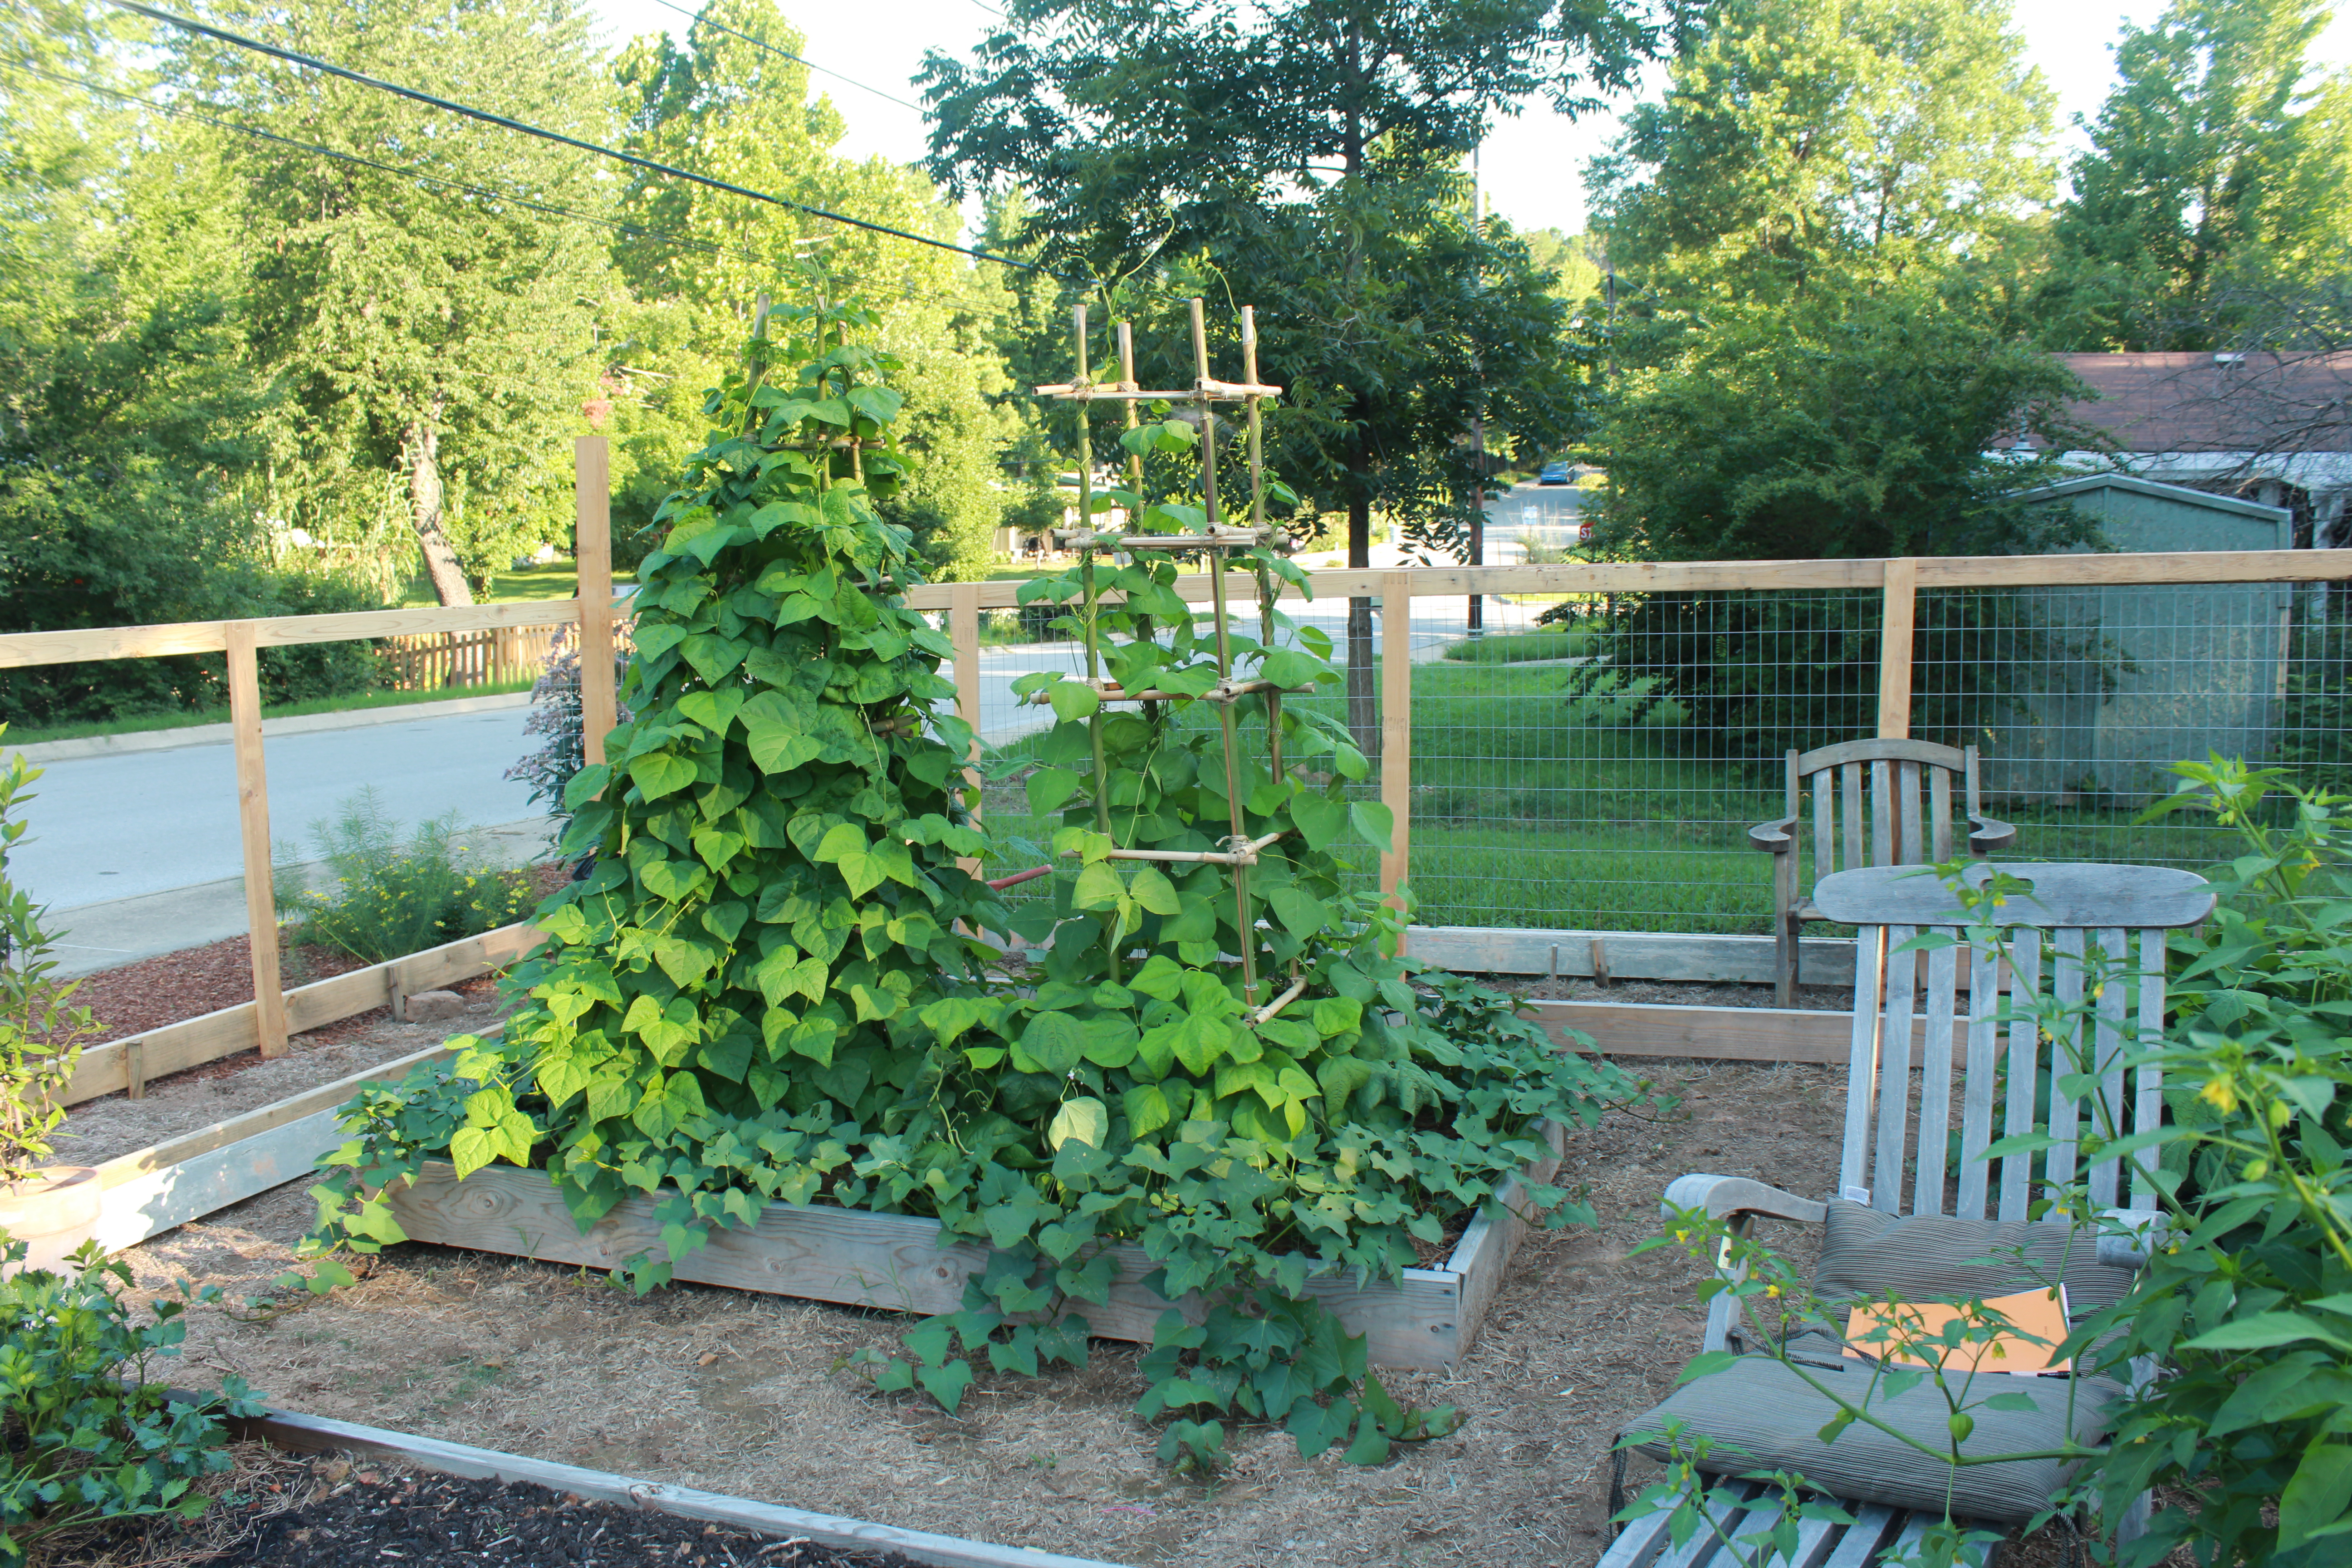
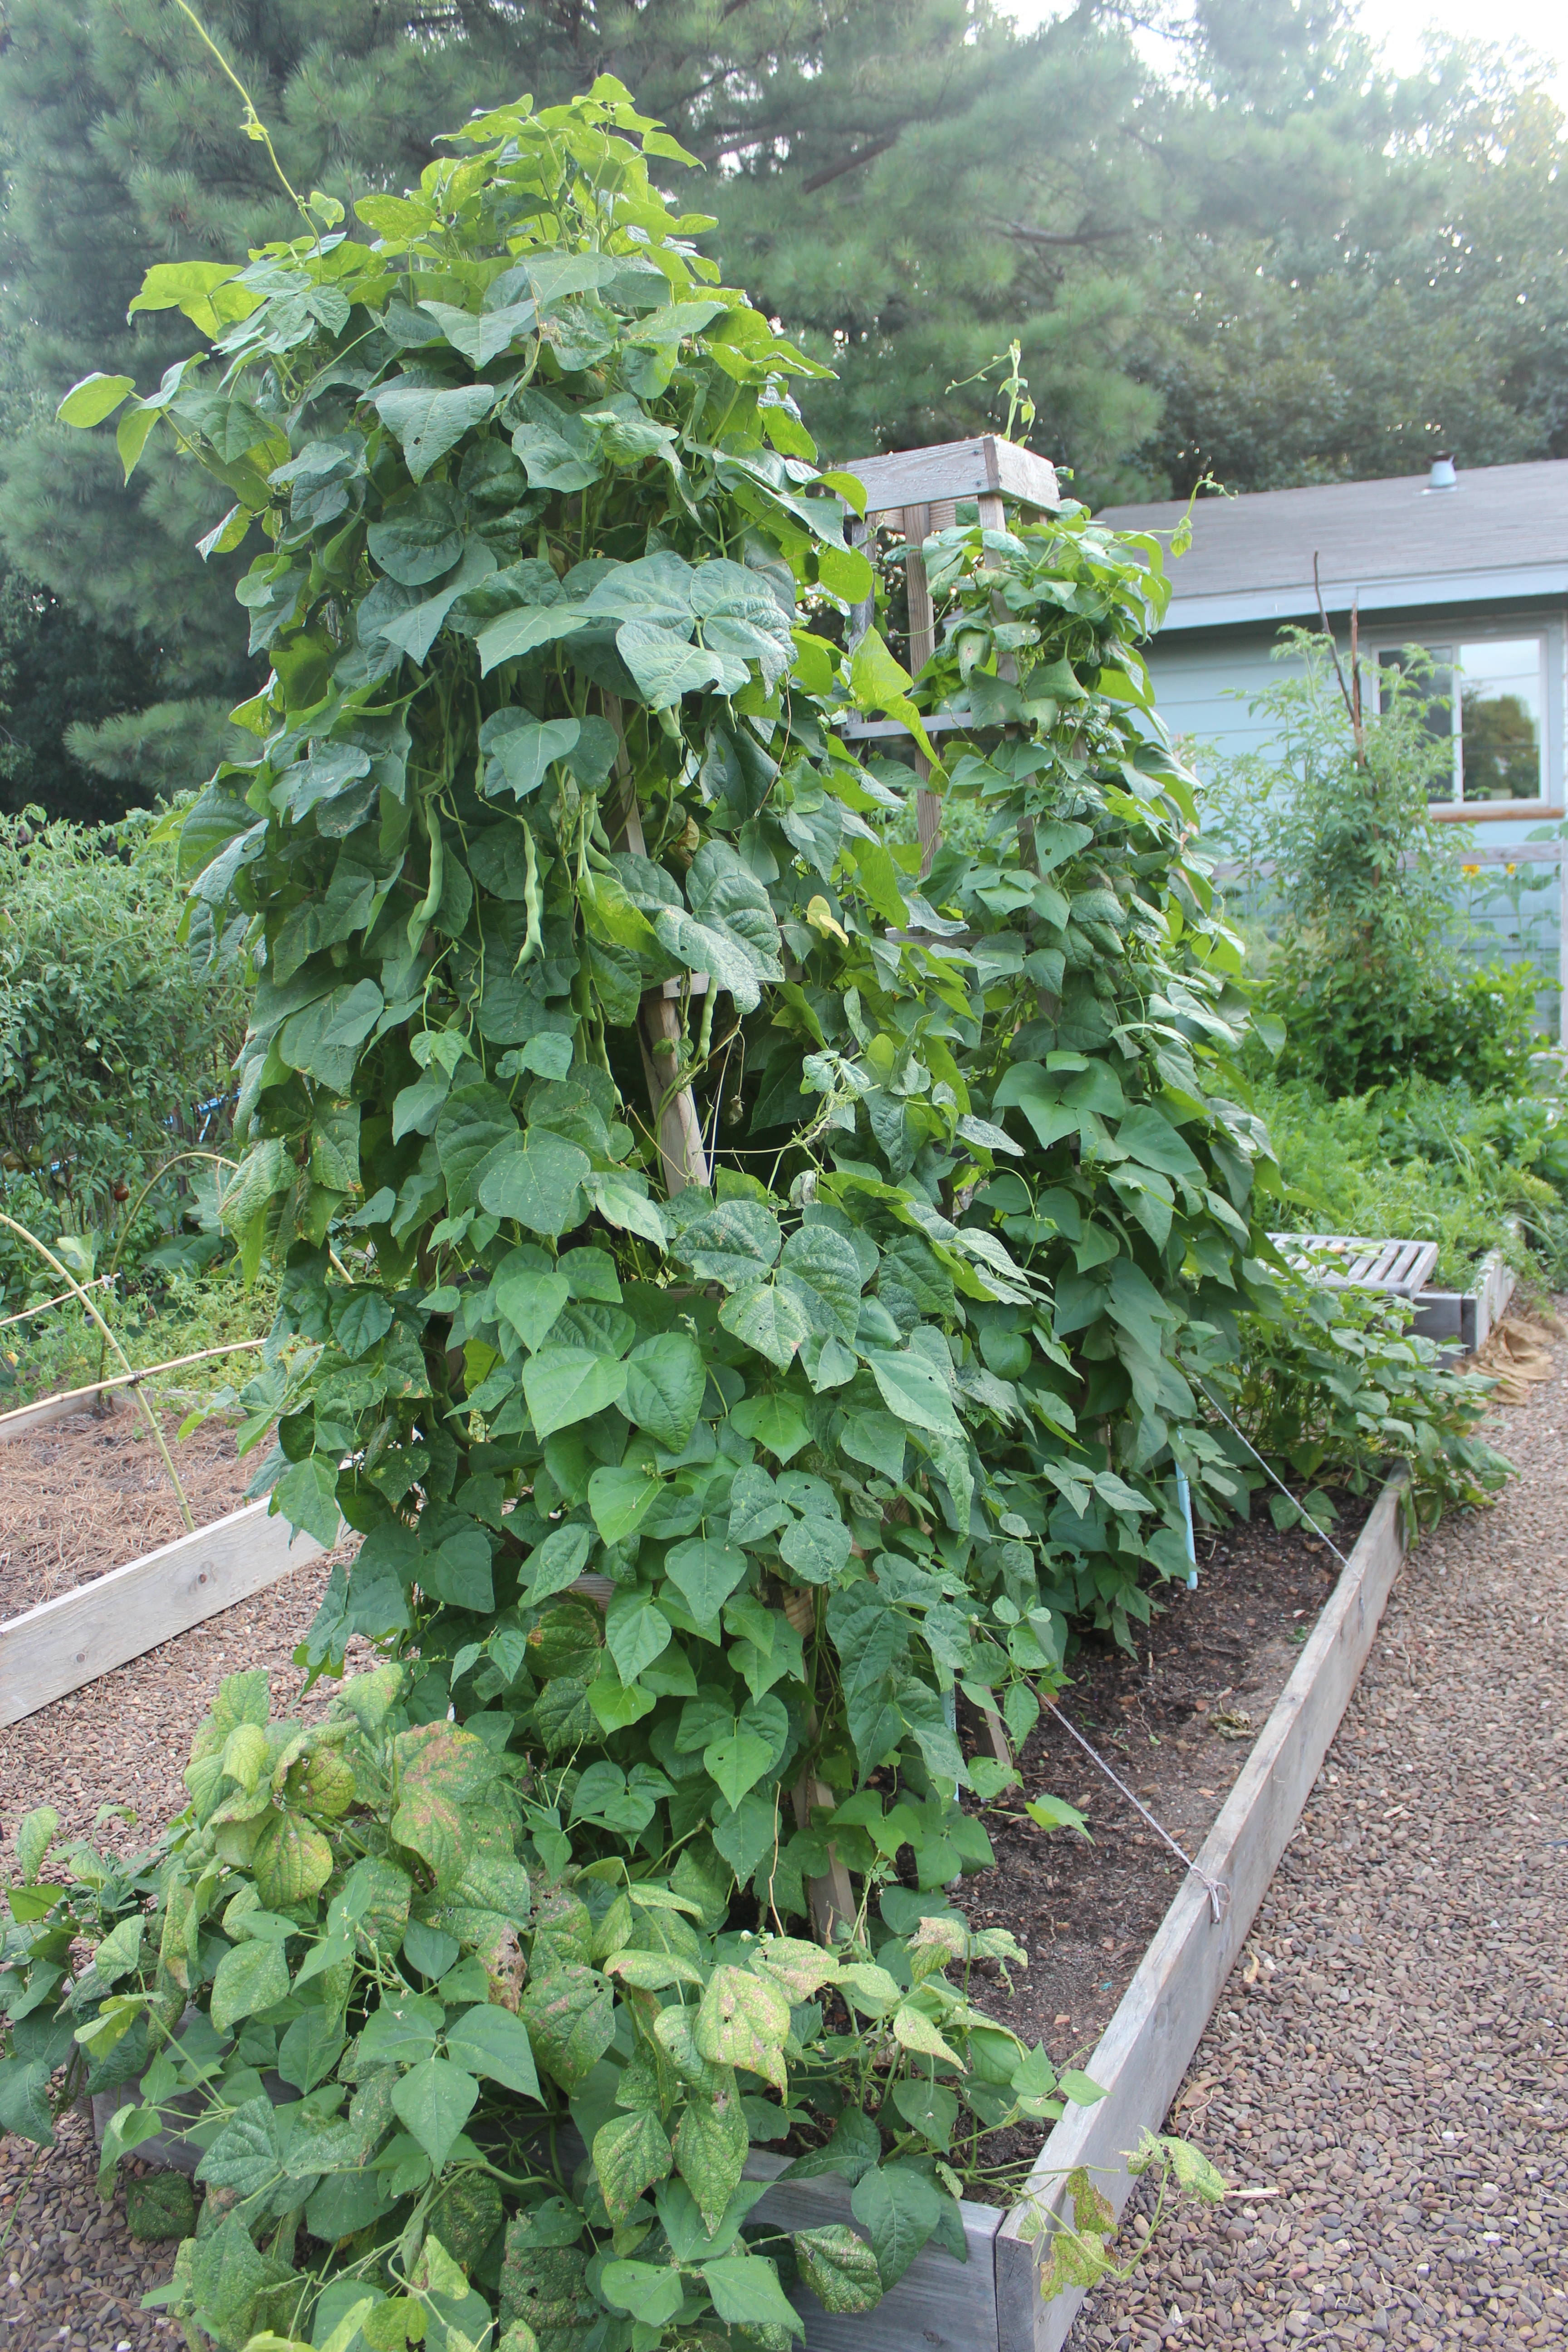
Growing pole beans makes me feel like a rock star.  I find it immensely rewarding, though I’ve only scratched the surface in terms of varieties and yields.  Shelling beans are their own seeds, so what you plant is what you get.  And they are sown in place rather than started indoors which is so much easier.  Plus, like Jack’s beanstalk, they climb, which saves valuable space in a small garden and gives you a third dimension visually.

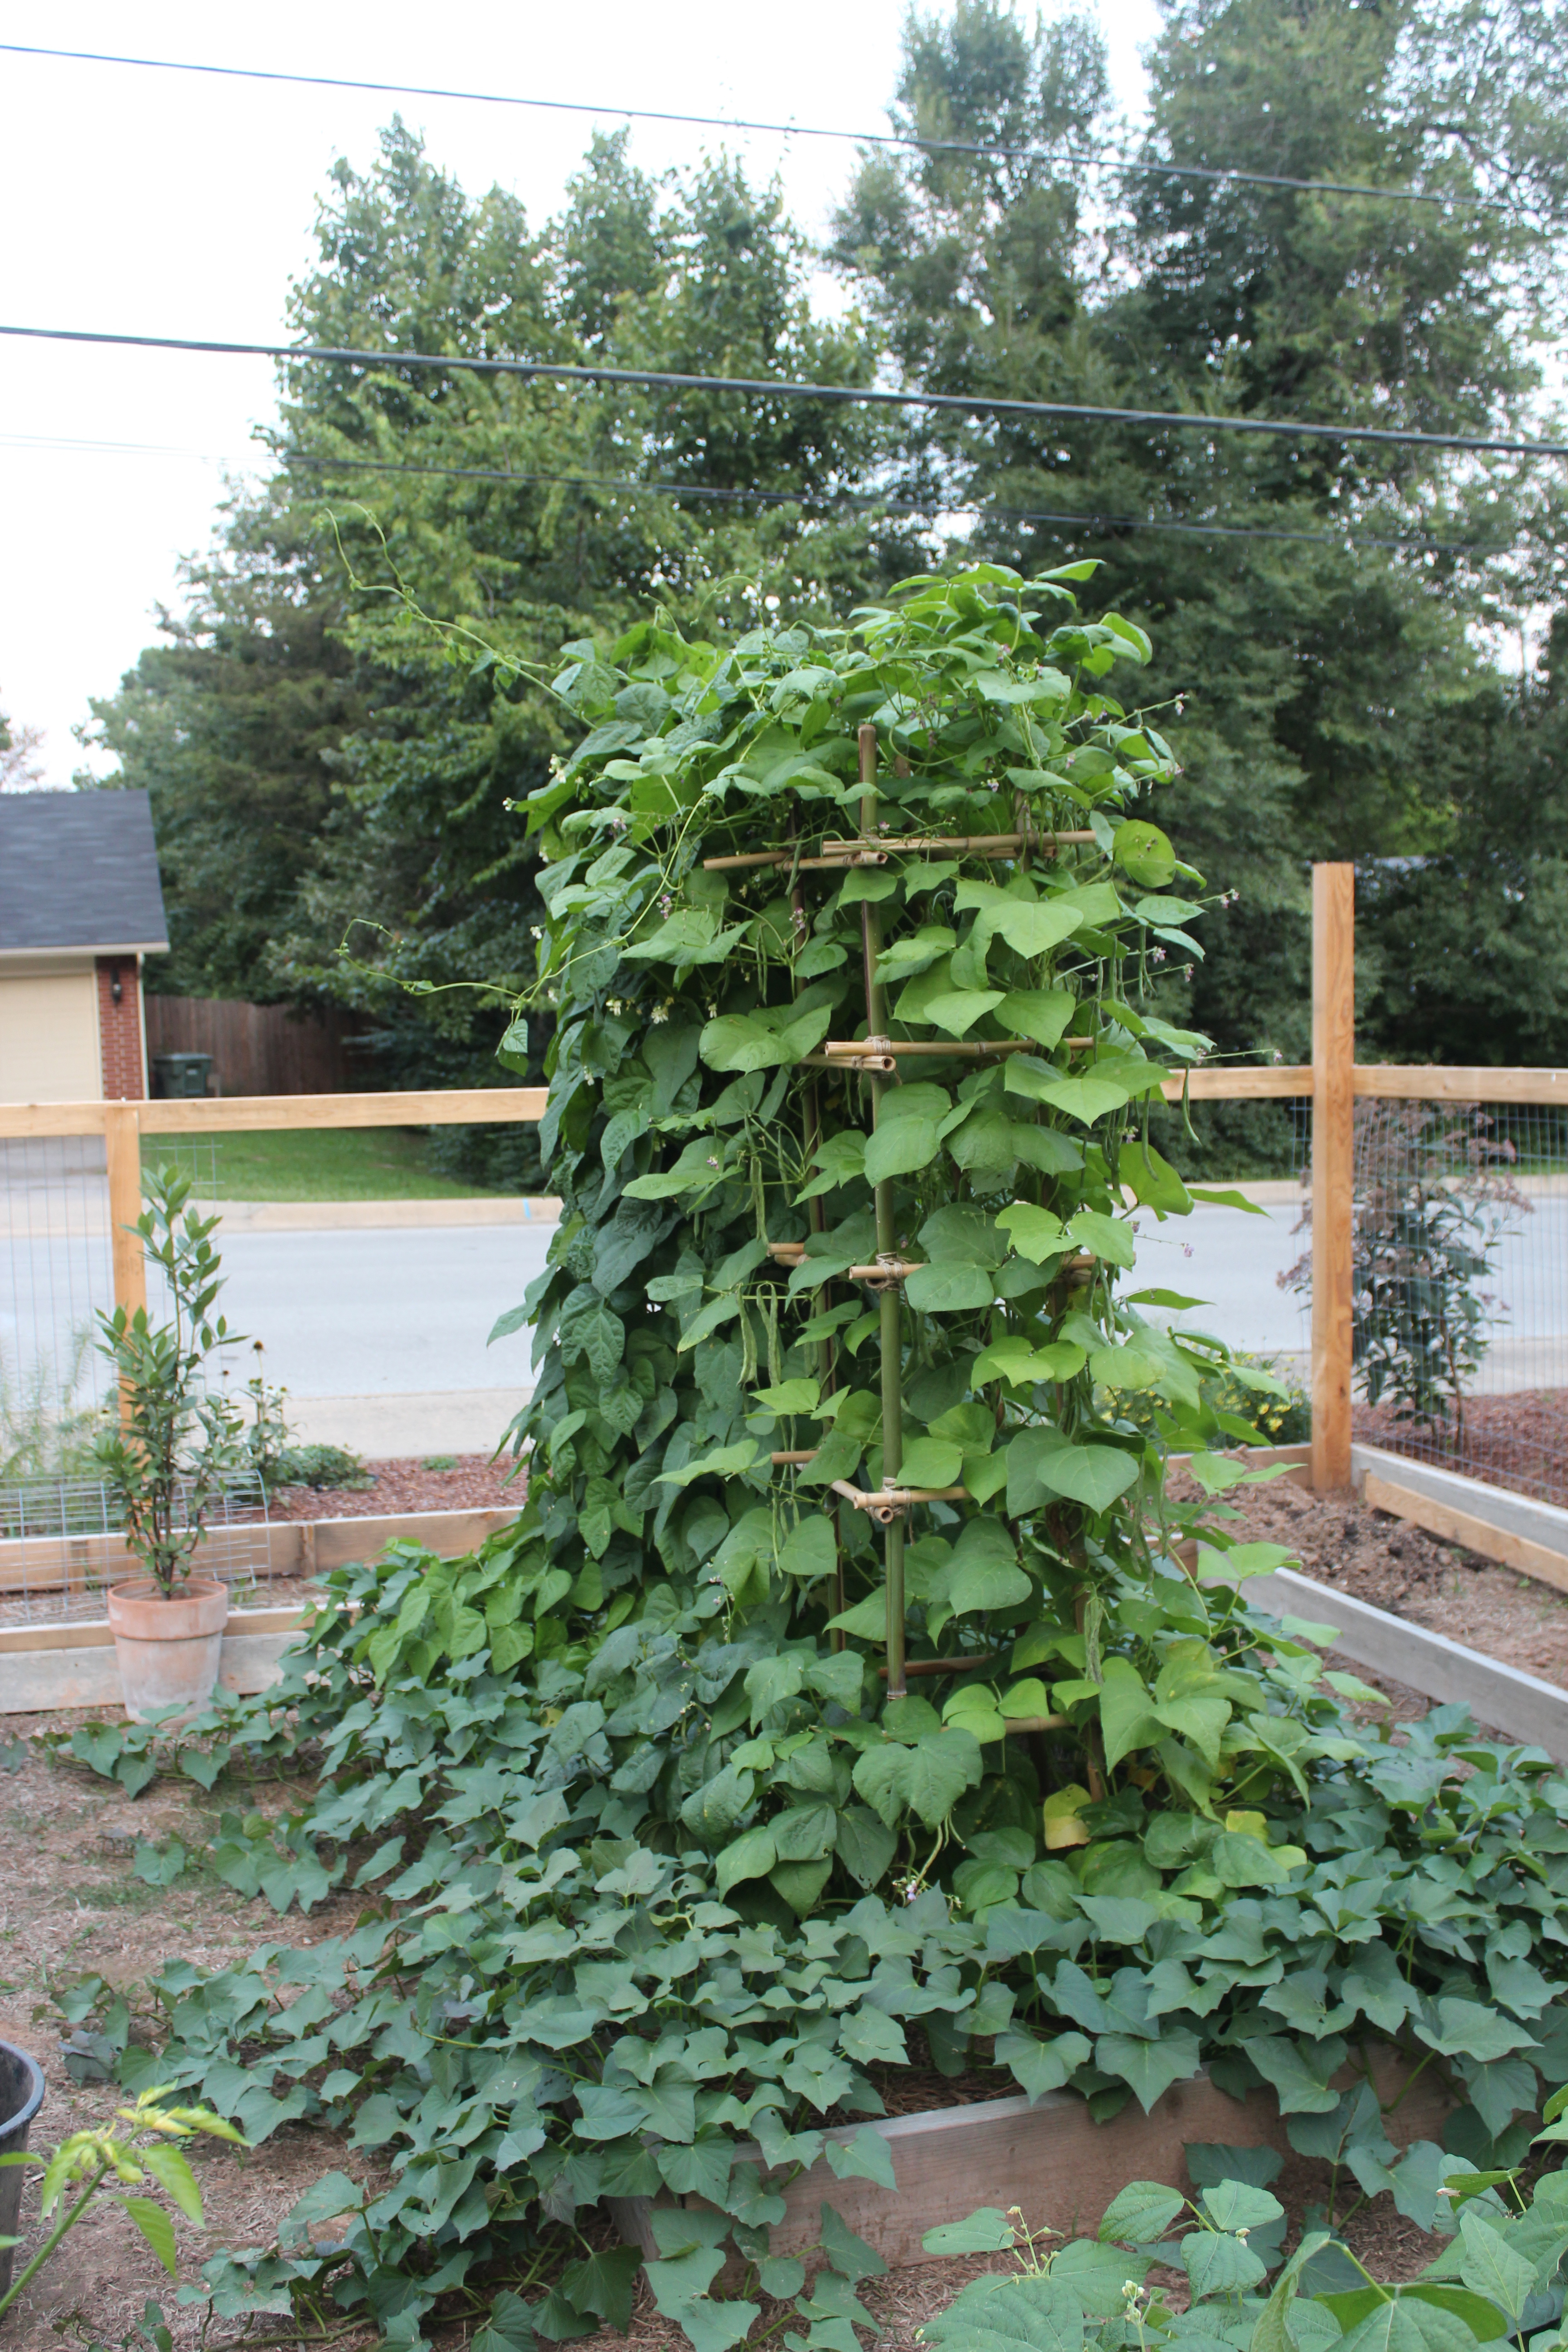
The first year I had my garden I fashioned these towers out of bamboo.

IMG_2059

They remind me of Gilligan’s Island.  Anyone fancy a Mai Tai?

Here’s why growing beans make me feel like a rock star.

July 28th, 2013.

IMG_2092

August 6th.

IMG_2609

August 21st!

IMG_2832

Guitar solo!!

I was obsessed with towers, or tuteurs as the French call them, for a while there.  I sketched them.  I scanned the horizon for them.  I dreamed about them.  I made a Pinterest board.  Ultimately, because I live in a ranch style house, I decided I wanted mine to look more like oil derricks than the Eiffel tower.

 Last spring David made me these.

IMG_4302

I adore them!  Here they are fulfilling their potential.  That’s our star ‘Haricot Tarbais’ on the front tower.

IMG_5266

IMG_5894

IMG_5863

Last year I direct-sowed beans on April 27th.  Unfortunately I planted potatoes in the same bed on April 2nd and they were already growing like gang busters.  The beans had trouble initially because they were shaded by the potatoes, but eventually they found their purchase and up they went.  Live and learn.

IMG_4816

Many vegetables are revered because they have a small window of seasonality.  Asparagus, peas, that perfectly ripe summer tomato, we appreciate these things because they are fleeting.  But the fabulous thing about beans is that you can store them.  Beans will get you through the winter.  They are so easily grown and so durable that they have traversed the globe and have been fundamental to human civilization.

The history of beans is a fascinating one.  I am currently devouring Ken Albala’s immensely compelling, “Beans A History” (2007), I highly recommend it and will continue to share with you what I’m learning from it.

Incidentally, he points out that in 2000 the Tarbais bean was awarded IGP (Indication Geographique Protegee) status, “which delimits where it can be grown, with what fertilizers and pesticides and protects the name legally”, similar to Champagne, or Parmesan Reggiano.  So maybe I should be calling them by another name?

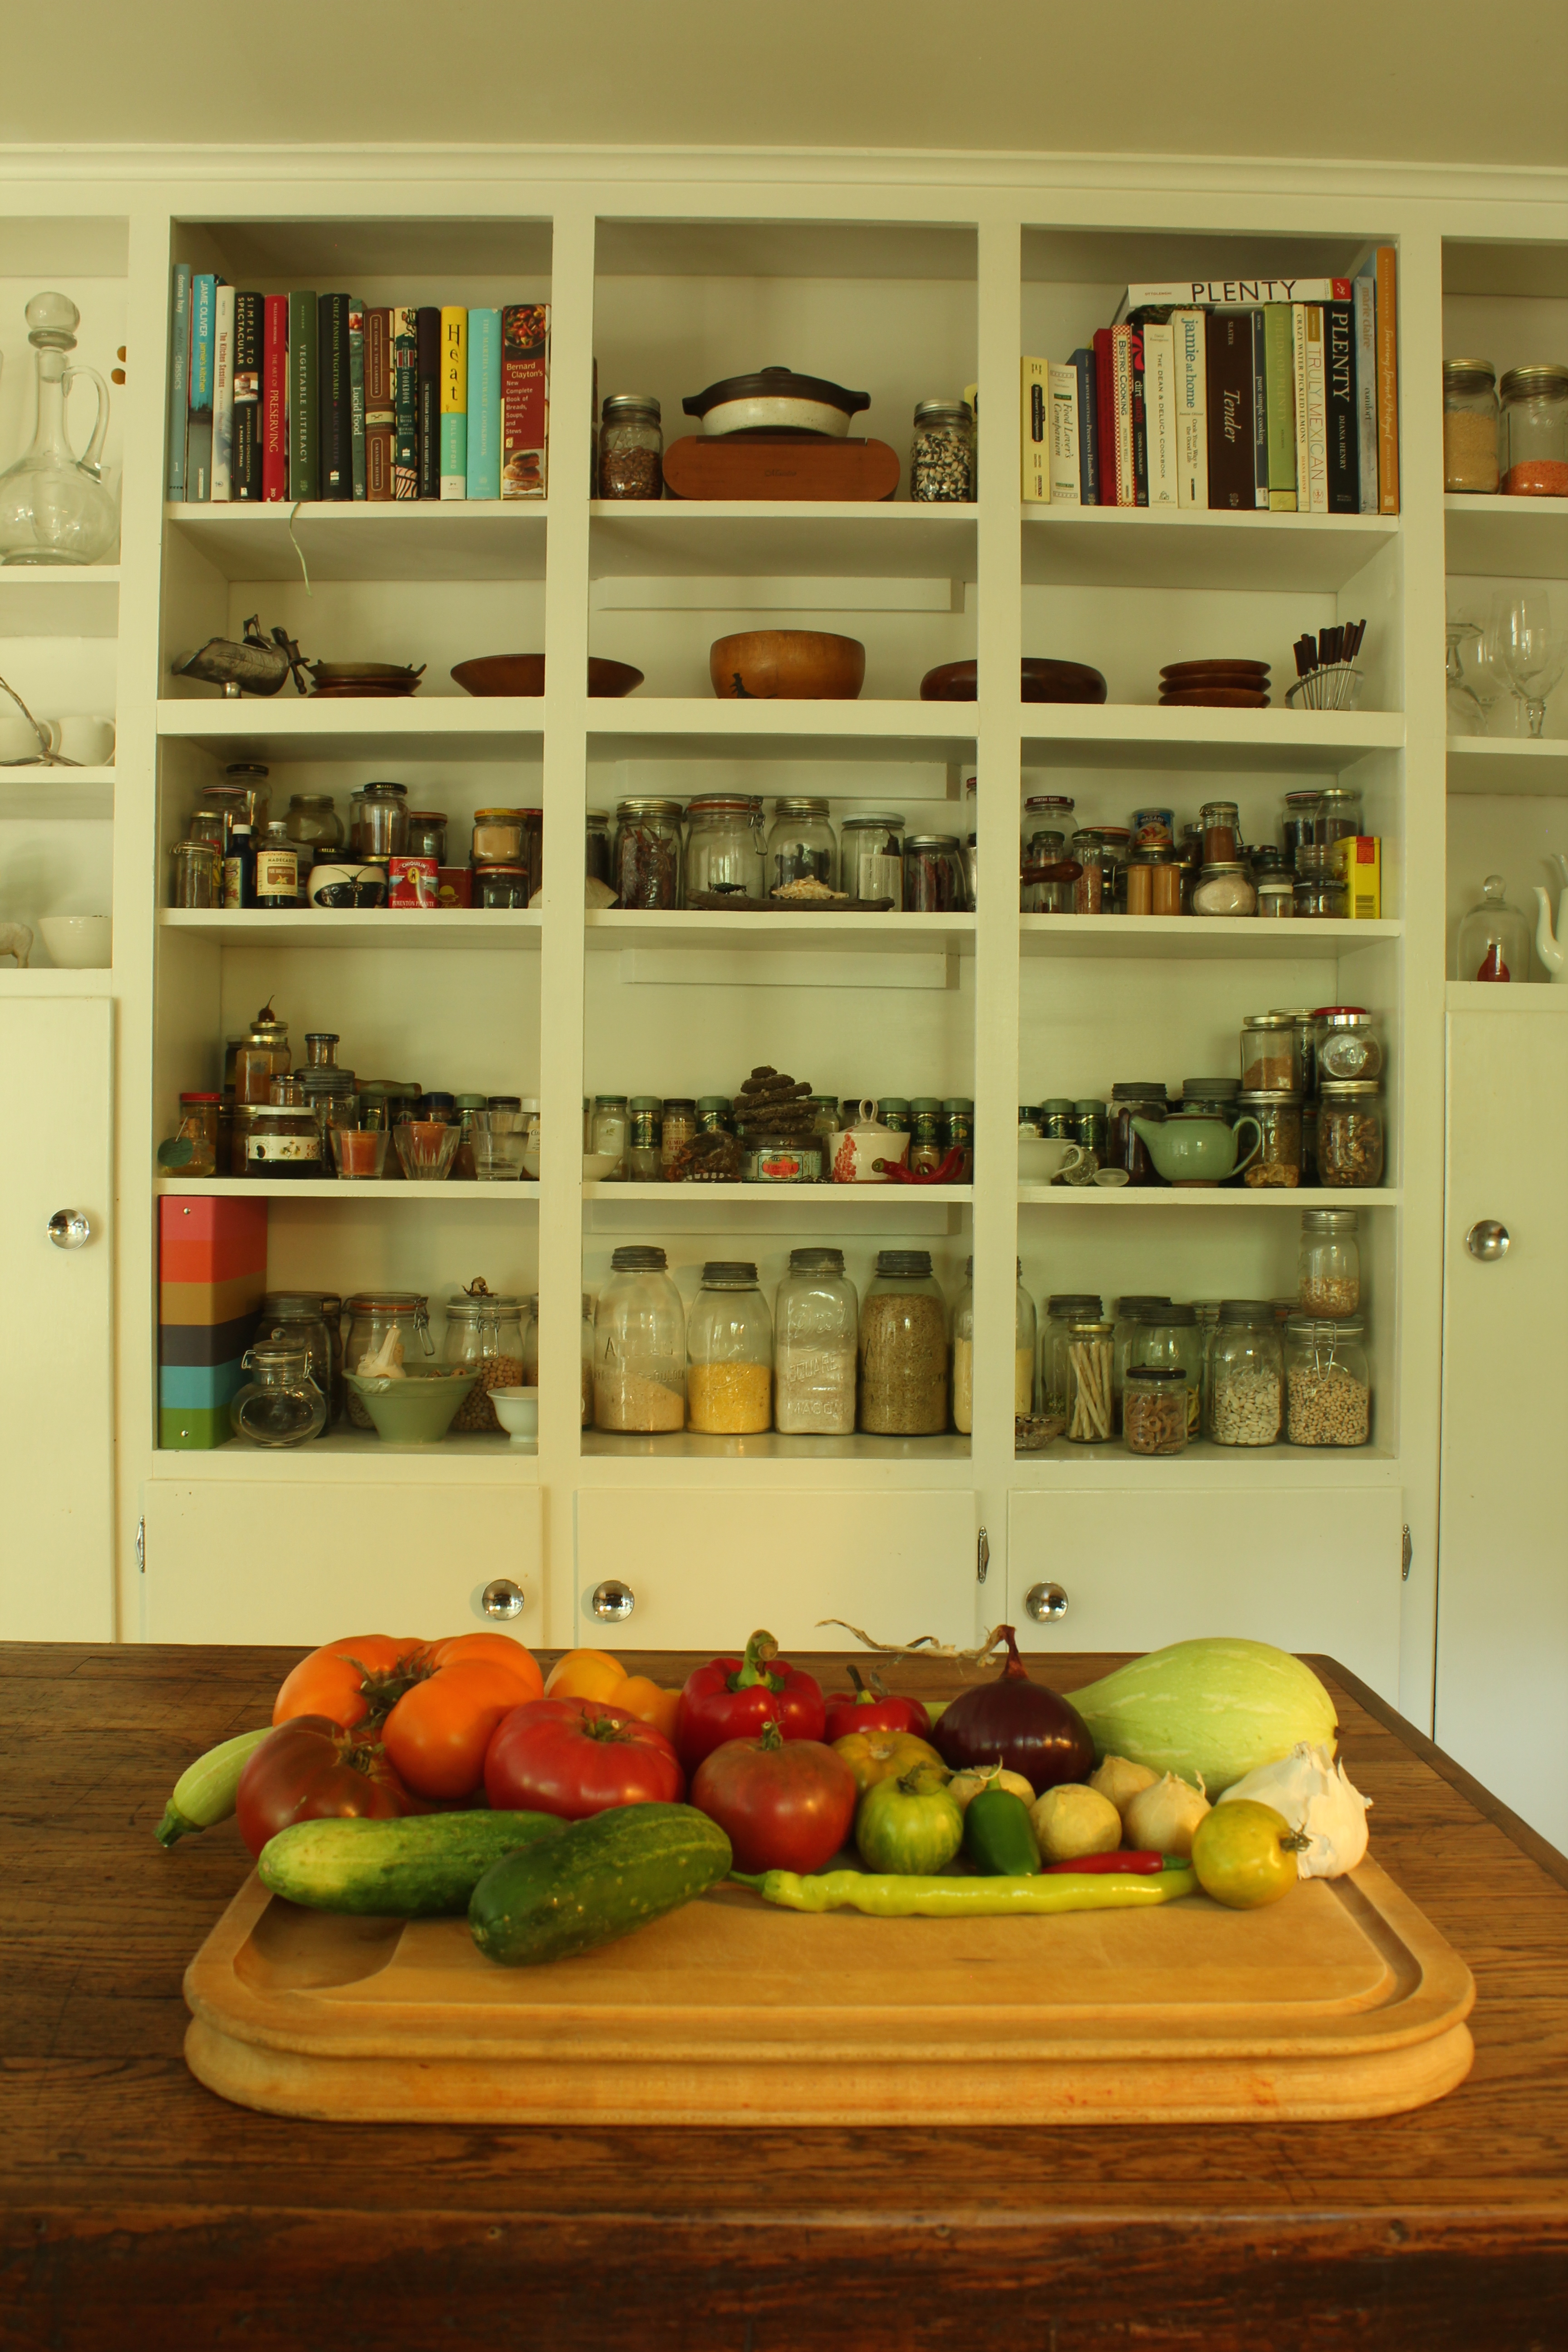
Another obsession.  Jars.  I love them.  And I love them best when they are filled with beautiful, colorful, nutritious beans!  I find a pantry stocked with jars of beans, grains, dried peppers, and spices a thing of great beauty and solace.  It declares, “As God is my witness, I’ll never be hungry again!”

IMG_5665

CASSOULET

IMG_7003

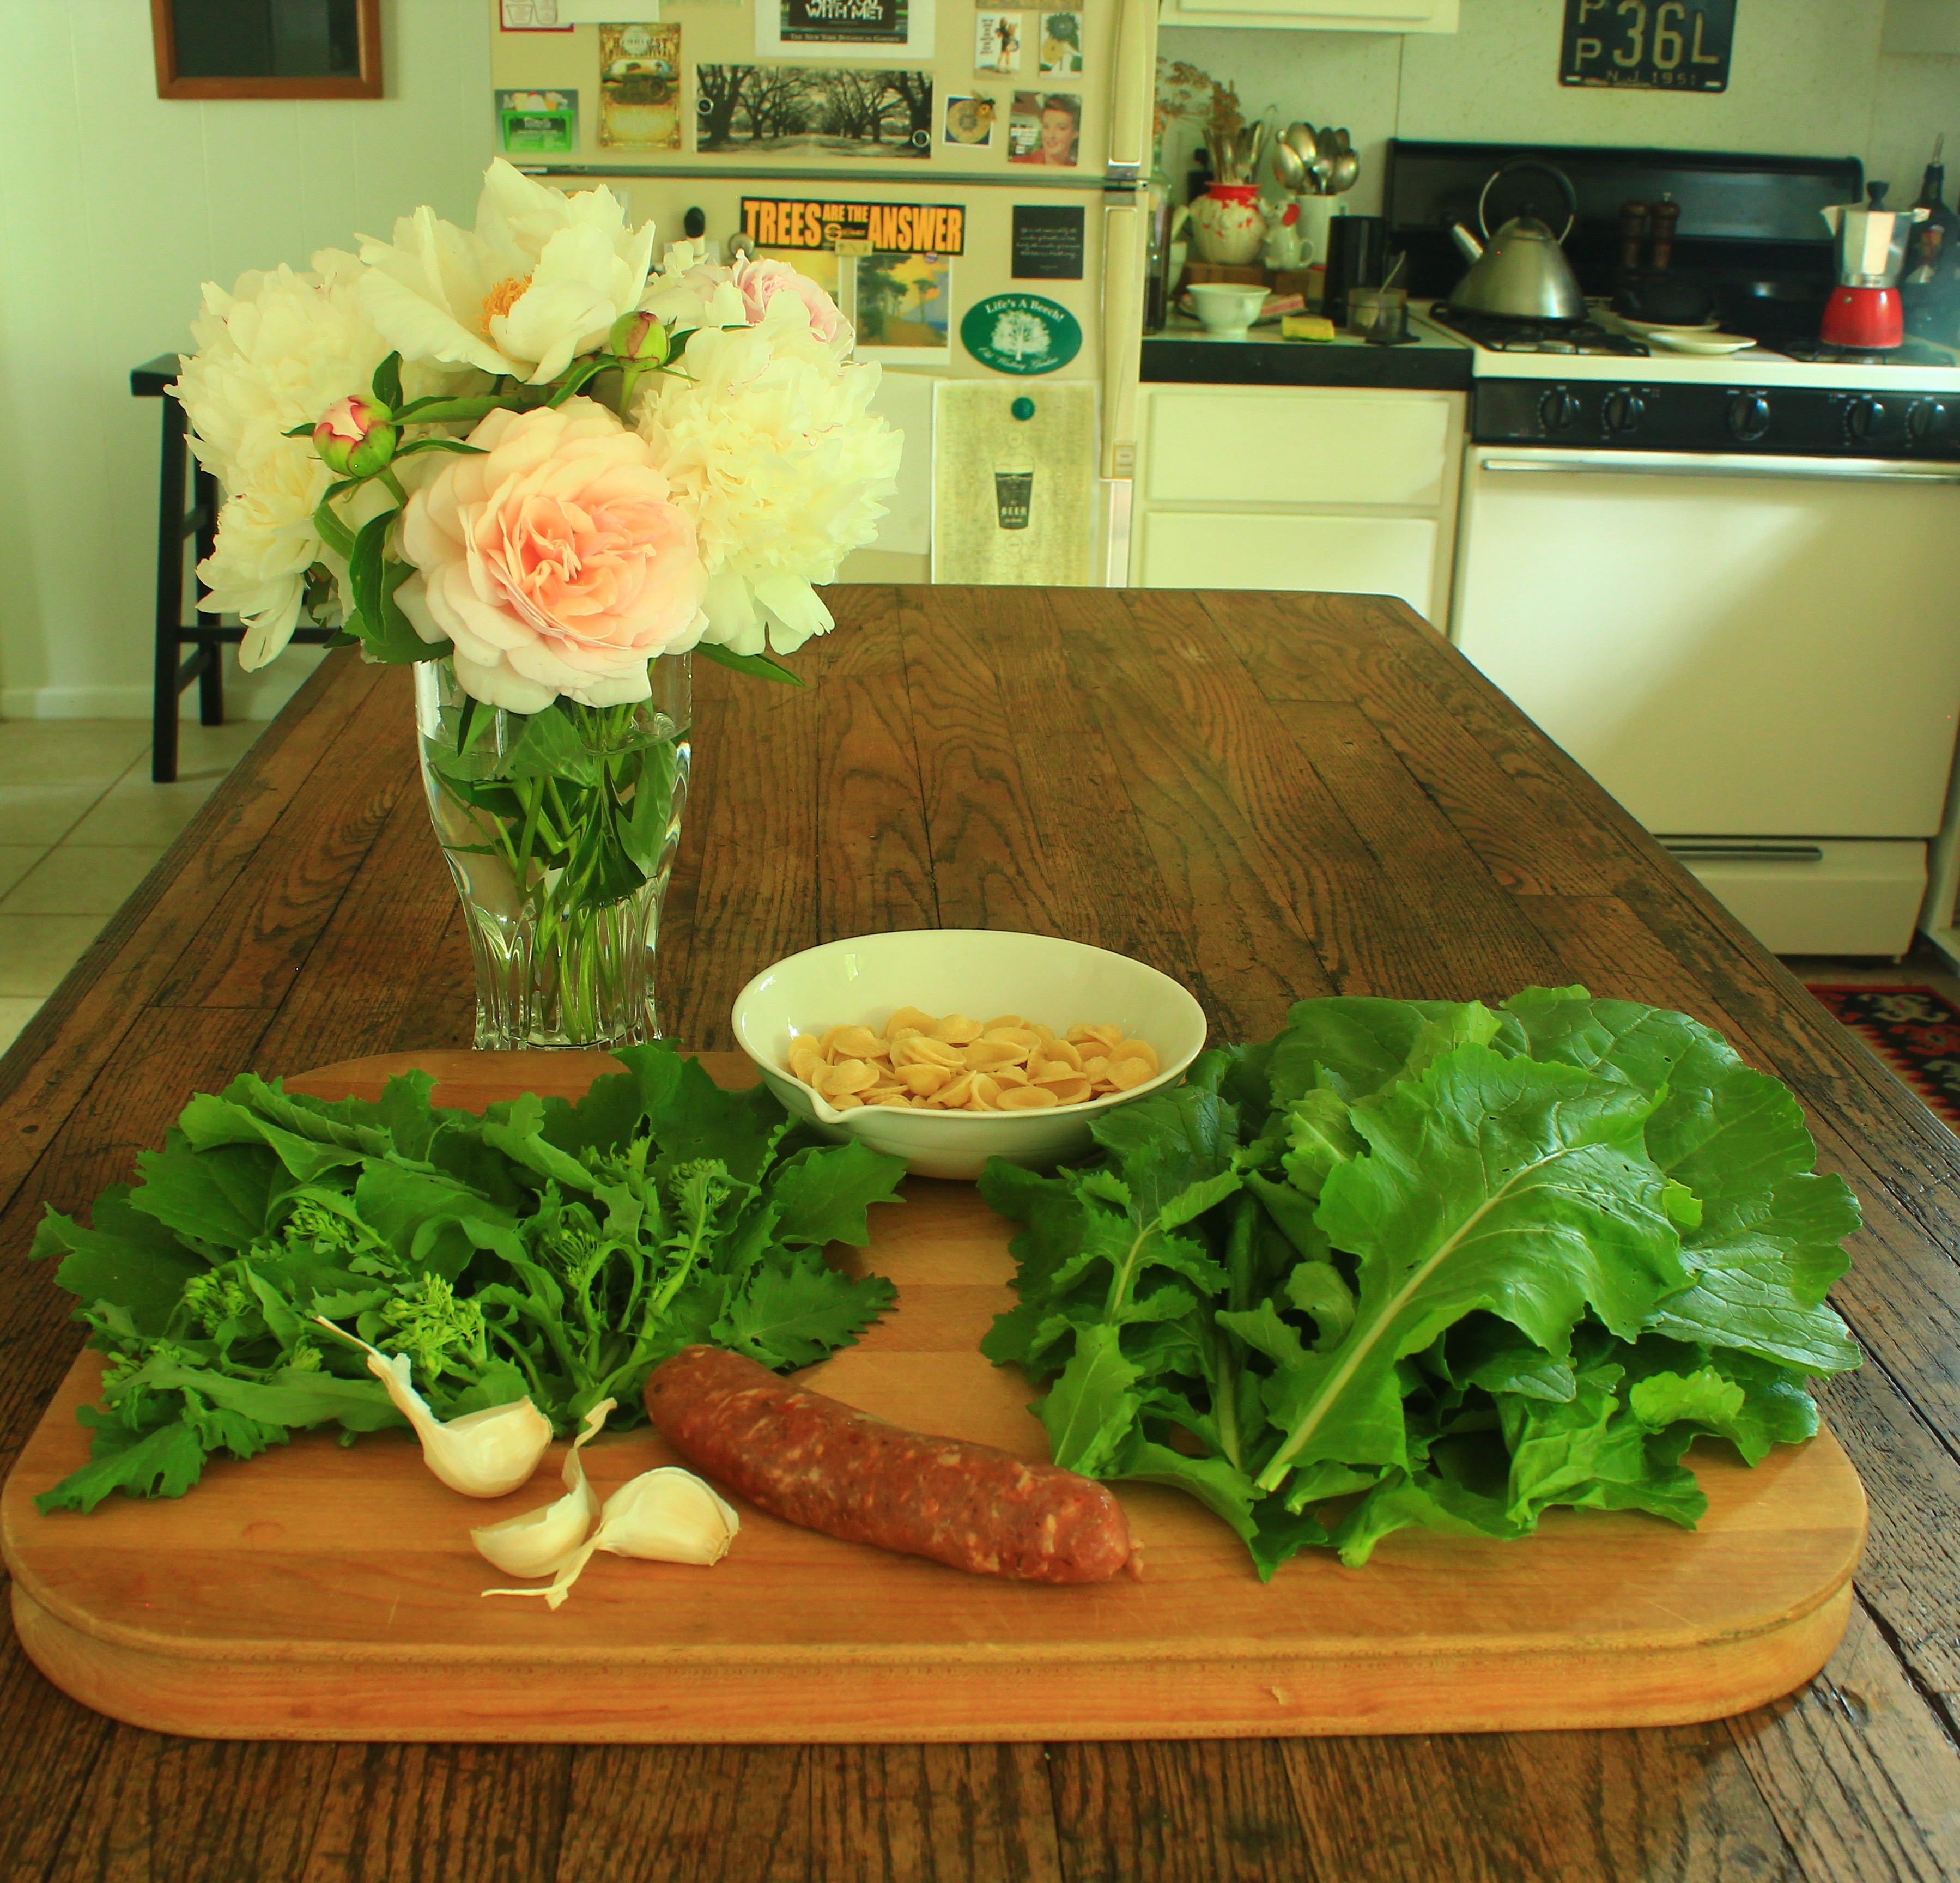
I still had about four cups of Tarbais beans and winter was running out.  I invited people over and kept checking the weather, hoping that Sunday’s would be dismal.  Time to make cassoulet!

Cassoulet is not difficult to make, but it does take several days (as does reading this post!).  I started, as I often do, with research.  Like many cooks I know, I like to peruse a number of sources for ideas, inspiration, and techniques, and then wing it.  My main sources for this cassoulet were Anthony Bourdain’s Les Halles Cookbook: Strategies, Recipes, and Techniques of Classic Bistro Cooking and David Lebovitz’ My Paris Kitchen: Recipes and Stories.  If you don’t know David Lebovitz, please check out his beautiful blog, http://www.davidlebovitz.com, and buy his cookbook, he is an inspiration.

Early in the week: Gather supplies.

One of the few things I miss about living in a big city is access to great grocery stores (yet another reason to grow your own).  Luckily, we have Richard’s, which is a solid meat market.  They had duck legs (frozen), rendered duck fat, a nice smoked ham shank, Italian sausages, and rosemary.  I already had garlic, thyme, bay leaves, gin, nutmeg, and allspice.

IMG_6904

Tuesday, Duck Confit: When the duck legs were thawed I poked them all over with a needle and then rubbed them with sea salt, a bit of allspice, and a few gratings of fresh nutmeg.  I packed them skin side down in a Pyrex dish on top of the rosemary, some thyme, three bay leaves, and about six cloves of garlic.  (David Lebovitz’ trick is to really pack them into the dish, or two dishes if necessary, with no space around them so that when the fat is rendered it makes a quick confit.)  I dribbled in a tablespoon of gin, covered them with plastic wrap, and refrigerated them overnight.  The next day I turned them skin side up, placed them uncovered in a cold oven, and turned it up to 300°.  I cooked them for 2 ½ hours, occasionally basting them with their fat and juices.  Then I turned the oven up to 375° for about 15 minutes to let the skins get crunchy.  I let them cool and then covered them with parchment paper and then aluminum foil and refrigerated them for a couple of days until I was ready for them.

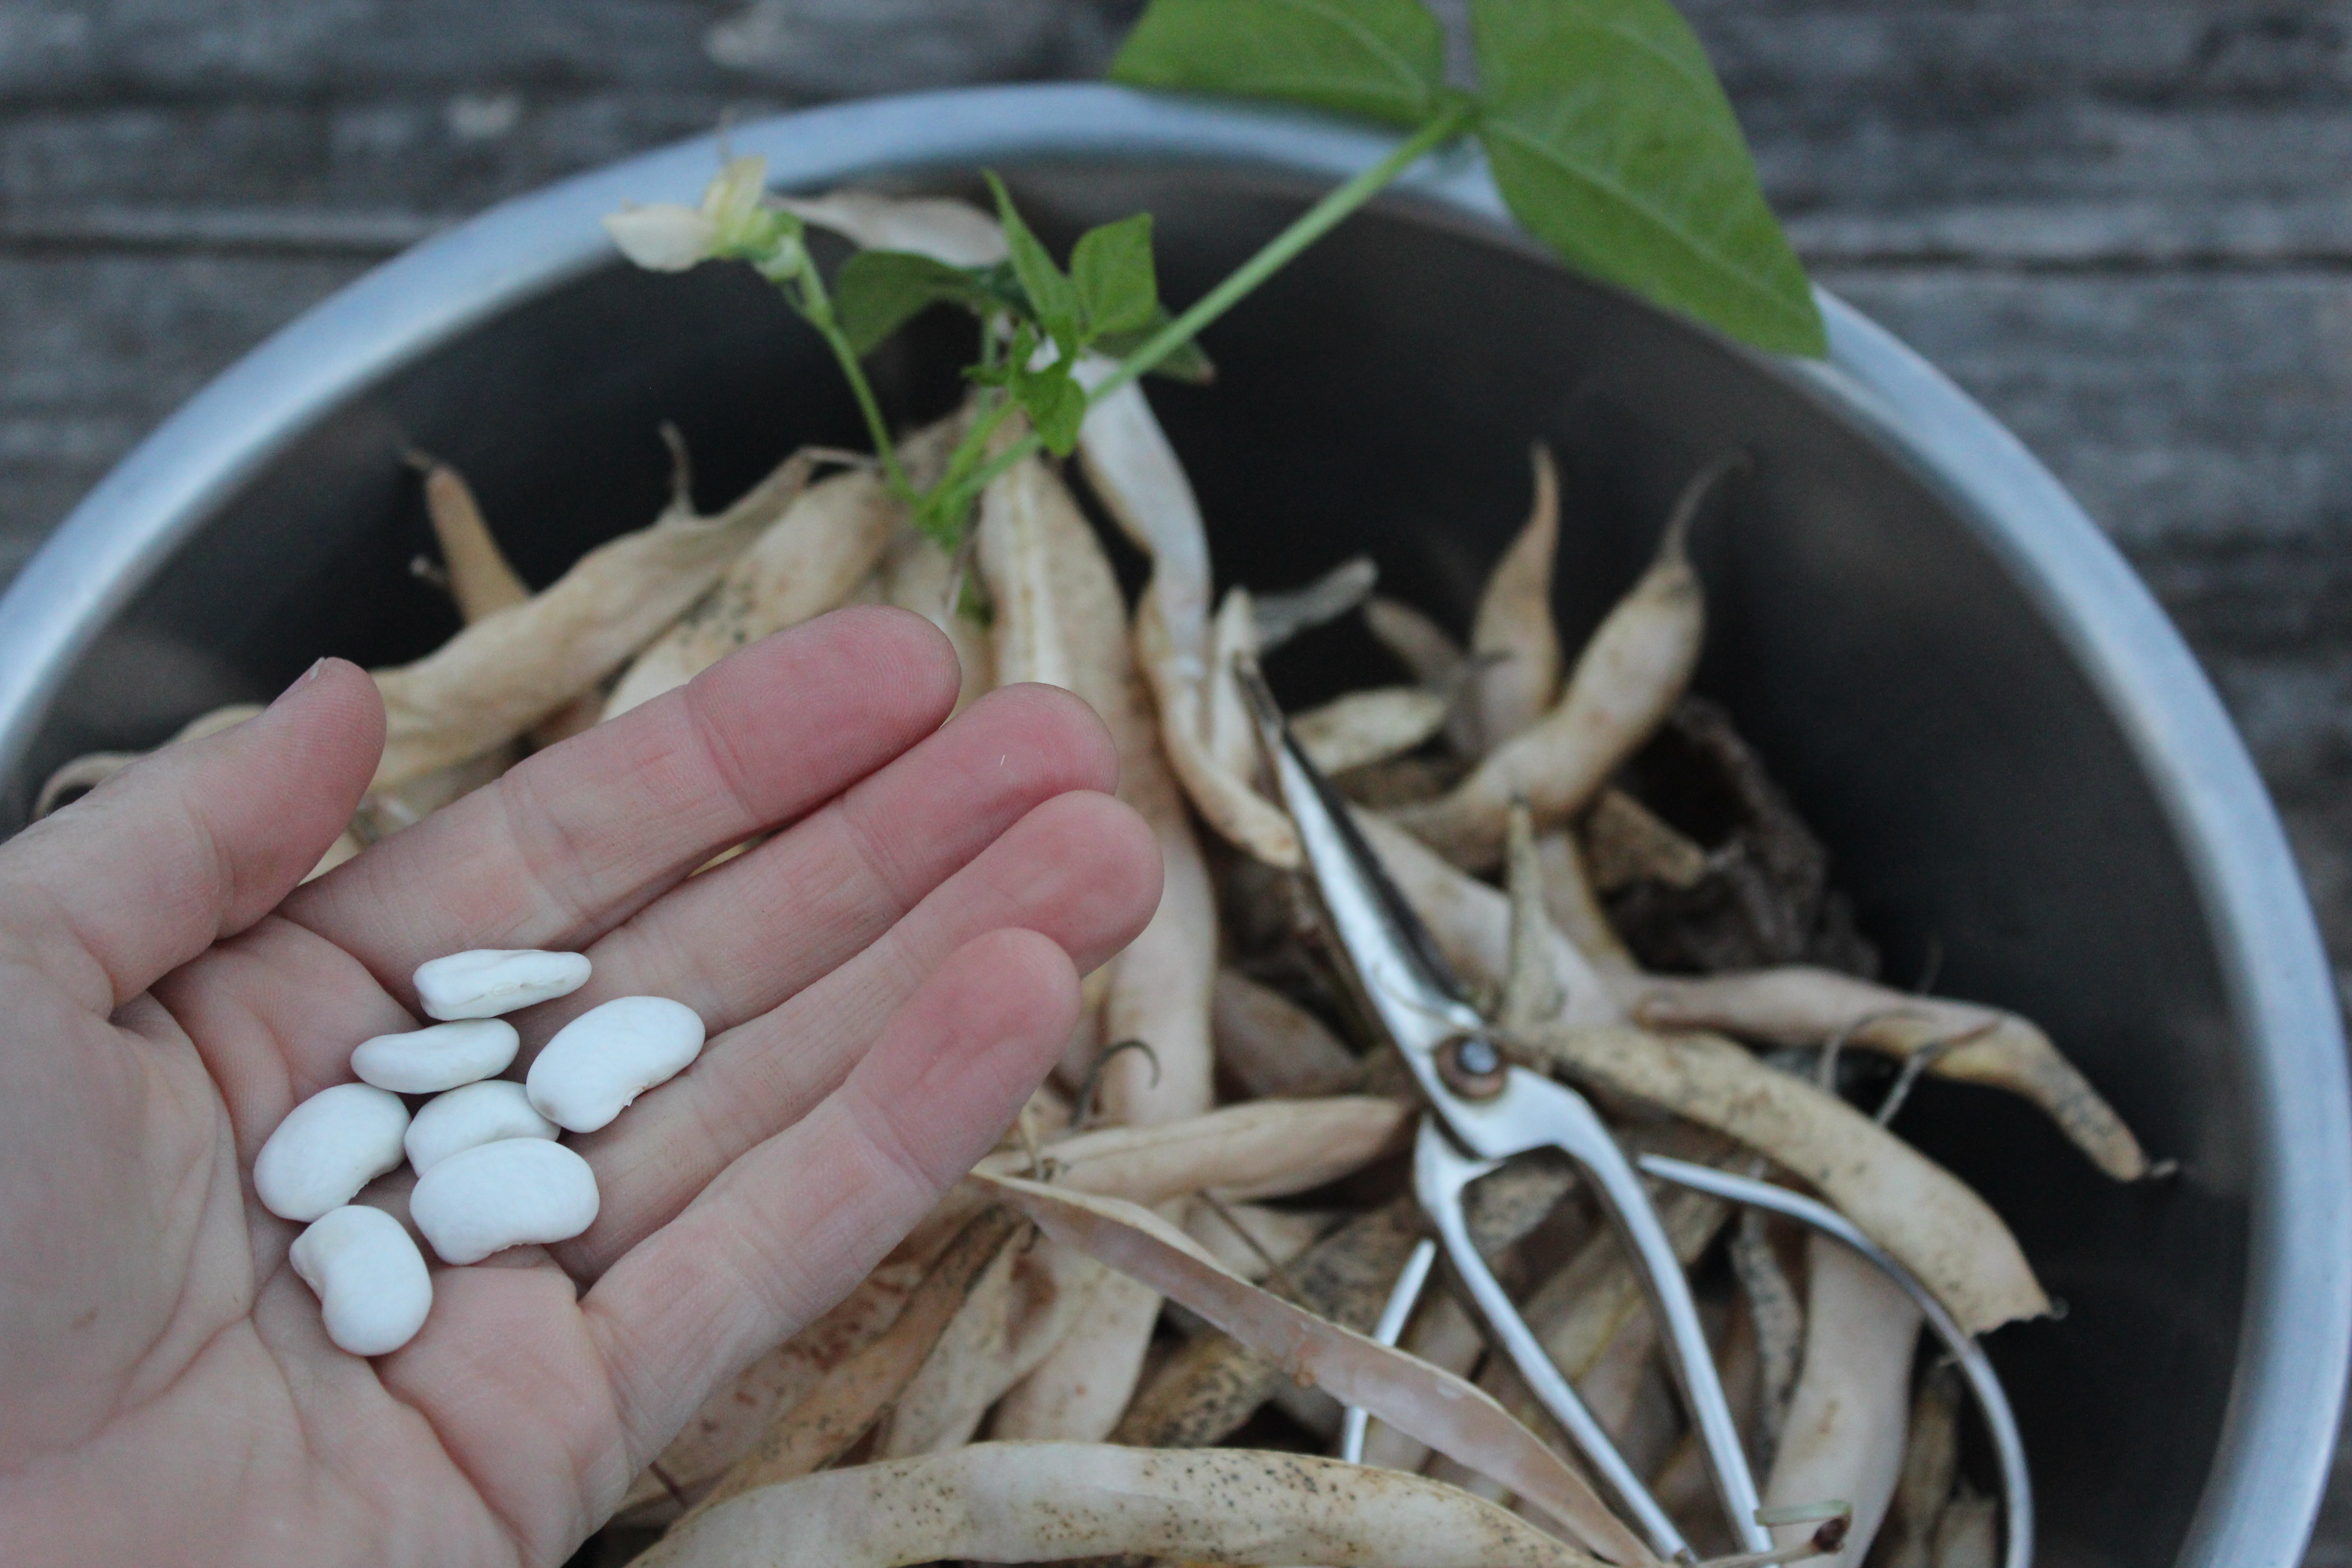
Friday:  I picked through the beans and discarded any that weren’t up to par.  Then I soaked the beans overnight in enough water to cover them by a couple of inches.

Saturday:  Cooking the beans.

IMG_7012

(Shout out to my mom for giving me this gorgeous copper stock pot for Christmas!  Thanks Mom, I love it!)

I drained the beans and put them in my gorgeous copper stock pot with the smoked ham shank, three peeled carrots, a quartered onion with a clove stuck in each piece, a couple of bay leaves, some thyme, about six cloves of peeled garlic, and several grinds of fresh black pepper.  I cooked them until they were tender.  Which took about two hours.  Maybe more.

 One of the reported wonders of the Tarbais bean, and the reason they are the heart of this dish, is that they can stand long cooking, becoming incredibly creamy and tender, while still maintaining their integrity.  They did not disappoint.

I took the ham shank out of the beans and put it aside to cool.  Then I prepared the other components.

I heated up my trusty cast iron skillet and placed the duck breasts skin side down to really crisp them up, I flipped them over for a minute and then set them aside to cool.  I poured off some of the fat and then cooked the sausages in the rest of it, not fully, just to brown them up.  I set them aside to cool with the duck.  Then I sliced up an onion and cooked it in the remaining fat and juices.

I fished the bay leaves and thyme out of the beans and discarded them.  I fished out the carrots, cut them up and put them back in the beans.  I tore the meat off the ham shank, cut it into bite sized pieces, and put that back in the beans.

I fished out the onions and garlic that hadn’t melted entirely and whizzed them in my blender with some of the bean juice, the onions from the skillet, and just a little salt.  Then I poured this puree into the beans.

I sliced up the sausages.  I separated the drumstick from each duck leg and cut the remaining piece in half.  Then I tasted it.  Credit must go to David and Anthony and the duck legs themselves, but it was one of the best things I’ve ever made.  Meltingly delicious.  I will definitely make duck confit again.

Time to assemble!

Oven preheated to 300°.

I don’t have a cassole, so I used my 8 quart dutch oven.  I covered the bottom with beans, layered in half of the sausage and duck, more beans, the rest of the sausage and duck, and finished with the rest of the beans.  Then I mixed a cup of panko bread crumbs with a tablespoon of olive oil and covered the beans with that.  Into the oven with you!

Cracking the crust of the cassoulet several times while cooking is one of the aspects of cassoulet on which there is much debate.  I only cracked mine twice.  I let it cool fully and refrigerated it.

Then I whipped up some Pear, Riesling, and Ginger Sorbet, to serve topped with prosecco as a refreshing, palate cleansing dessert.  http://www.seriouseats.com/recipes/2014/01/pear-riesling-and-ginger-sorbet.html  and went to bed!

When I have people over I always get carried away.  I’m usually tipsy, two hours behind, and still standing over the stove in pajamas with dirty hair when my first guests arrive.  I madly put those unfortunate souls to work while I put on pants.  Lucky for me, the French believe cassoulet is best if served réchauffé, or reheated.  This made party day a piece of cake.  My house was clean, I was clean, the fire was blazing and the candles were lit.  Come on in!

IMG_6250

Thanks Janine for the party day pictures!

SNOW DAY DOG BISCUITS

It’s mid-February and we’ve just had our first snow day of the season.  (Sorry East Coasters.)  I know a lot of people here who were ready for one, so I’m glad they got it.  I enjoyed mine after I finally settled into it – I tell you, I can squander half a day off deciding on the best way to spend it.  Why is it so hard to simply let a day unfold?

I recently rearranged my living room so I could plan my garden and work on this blog in front my newly painted fireplace.  It’s so much cozier, and the light is better too.  It’s made me much more productive.

IMG_6820

I began by starting a fire.  Then I brought in some branches from the quince out back that is going to take over my neighborhood if I don’t do something about it soon.  Hopefully they’ll start blooming in the next couple of days.

I’ve been wanting to make Wilson some more dog biscuits since I ran out of the last batch and today seemed like the day.  This is a quick fun recipe.  It’s also a nice tactile activity that provides healthy unprocessed treats for your best buddy and gives you a good reason to turn on the oven on a cold day.  They make great gifts too.  Turn up the music, get your hands into it, and in 45 minutes, with a few basic ingredients, you can have approximately 50 Homemade Dog Biscuits.  If you don’t have wheat germ on hand, it’s a good thing to have around.  It’s filled with vitamins and minerals, and is a good source of animal-free protein.  You can slip it into all sorts of recipes from smoothies to baked goods.  This recipe is adapted from the 2014 holiday issue of Front Porch, the magazine of the Arkansas Farm Bureau.  

Homemade Dog Biscuits

  • Servings: 50
  • Difficulty: easy
  • Print

IMG_6831

H O M E M A D E   D O G   B I S C U I T S

1 C      whole wheat flour

1 C      white flour

1/4 C   cornmeal

1/4 C   wheat germ

1/4 C   Asiago cheese, finely grated

1          egg

1 t        (or so) fennel seeds, pestled (optional, but good for the breath and health of your dog)

2 T       (or so) fresh parsley, chopped fine-ish (optional, see above)

1 C       (or so) chicken stock

——

Preheat the oven to 350.  Line two baking sheets with parchment paper.  

Mix all ingredients except the chicken stock into a big bowl.  Add the chicken stock and stir until everything comes together.  You might need to add flour or chicken stock at this point to get a nice dry-ish dough that won’t stick to your rolling pin.  Turn the dough out onto a floured surface, or a piece of parchment paper.  (It took me forever to get the dough out of the cracks of my rustic prep table last time, hence the parchment paper…) 

Roll it out until it’s about 1/4″ thick.

I borrowed dog bone-shaped cookie cutters from my sister, but you could simply cut them into an appropriate size for your friend or use a cookie cutter of another shape.  I assure you, the recipient won’t care.

Keep putting the dough scraps back together, rolling it out, and cutting biscuits until you have used up your dough.

Place in the oven and bake for around fifteen minutes.  Keep an eye on them and don’t let them get too brown.  Because they’re golden to begin with that can be a little tricky.

IMG_6839


IMG_6840

IMG_6841

IMG_6846

Try one yourself when they cool down – you know what’s in them.  With the addition of some salt, they might make a decent little person biscuit.  I’m going to experiment with adding applesauce or peanut butter in there next time.  Keep them in an air tight container and dole them out when appropriate.  Since Wilson found a rib, a bagel, and a Super Sonic breakfast burrito (the tater tot gave it away) on our walk this morning (in the snow, no less) and reluctantly relinquished them, maybe I’ll give him an extra one today.  He’s obviously starving.

Next up, all about leeks!  Stay warm out there!