ONIONS

Waxing philosophic about onions is a bit like writing poems to your feet. Yet where would most of us be without those? They are the foundation upon which everything else stands. They provide us with balance, structure, and support. When your dogs are barking, nothing else matters. Onions (Allium cepa) are much the same. Among the first vegetables ever cultivated, remains of them have been found that date back to 5,000 BC. It’s believed that they originated in Asia, but it’s also possible they grew wild on every continent.

If space is a consideration in your garden, onions might not be at the top of your grow-your-own wish list. After all being the most widely eaten vegetable in the world, they are available year round at any grocery store or farmer’s market. Still, I love onions and I can’t imagine cooking without them, so when I ran across onion seedlings at a nursery last March I thought, why not? And I’ll tell you, the experience of going out to my garden and harvesting an onion moments before I needed it was so satisfying that I’m doing it again this year. Homegrown onions taste better and can be harvested at any stage of their growth – as spring onions at their immature stage, throughout the summer as their bulbs begin to develop, and, if cured and stored properly, throughout the winter. Onions are with us full circle.

Nutritionally, onions are low-calorie powerhouses. They are high in vitamin C, dietary fiber, and folic acid and contain calcium, iron, phosphorus, potassium, manganese, and magnesium. They also contain the flavonoid quercetin, an anti-oxidant that may help in the prevention of heart disease and many cancers. They are anti-inflammatory and anti-bacterial. Eating them regularly increases bone density, strengthens connective tissue, and balances blood sugar.

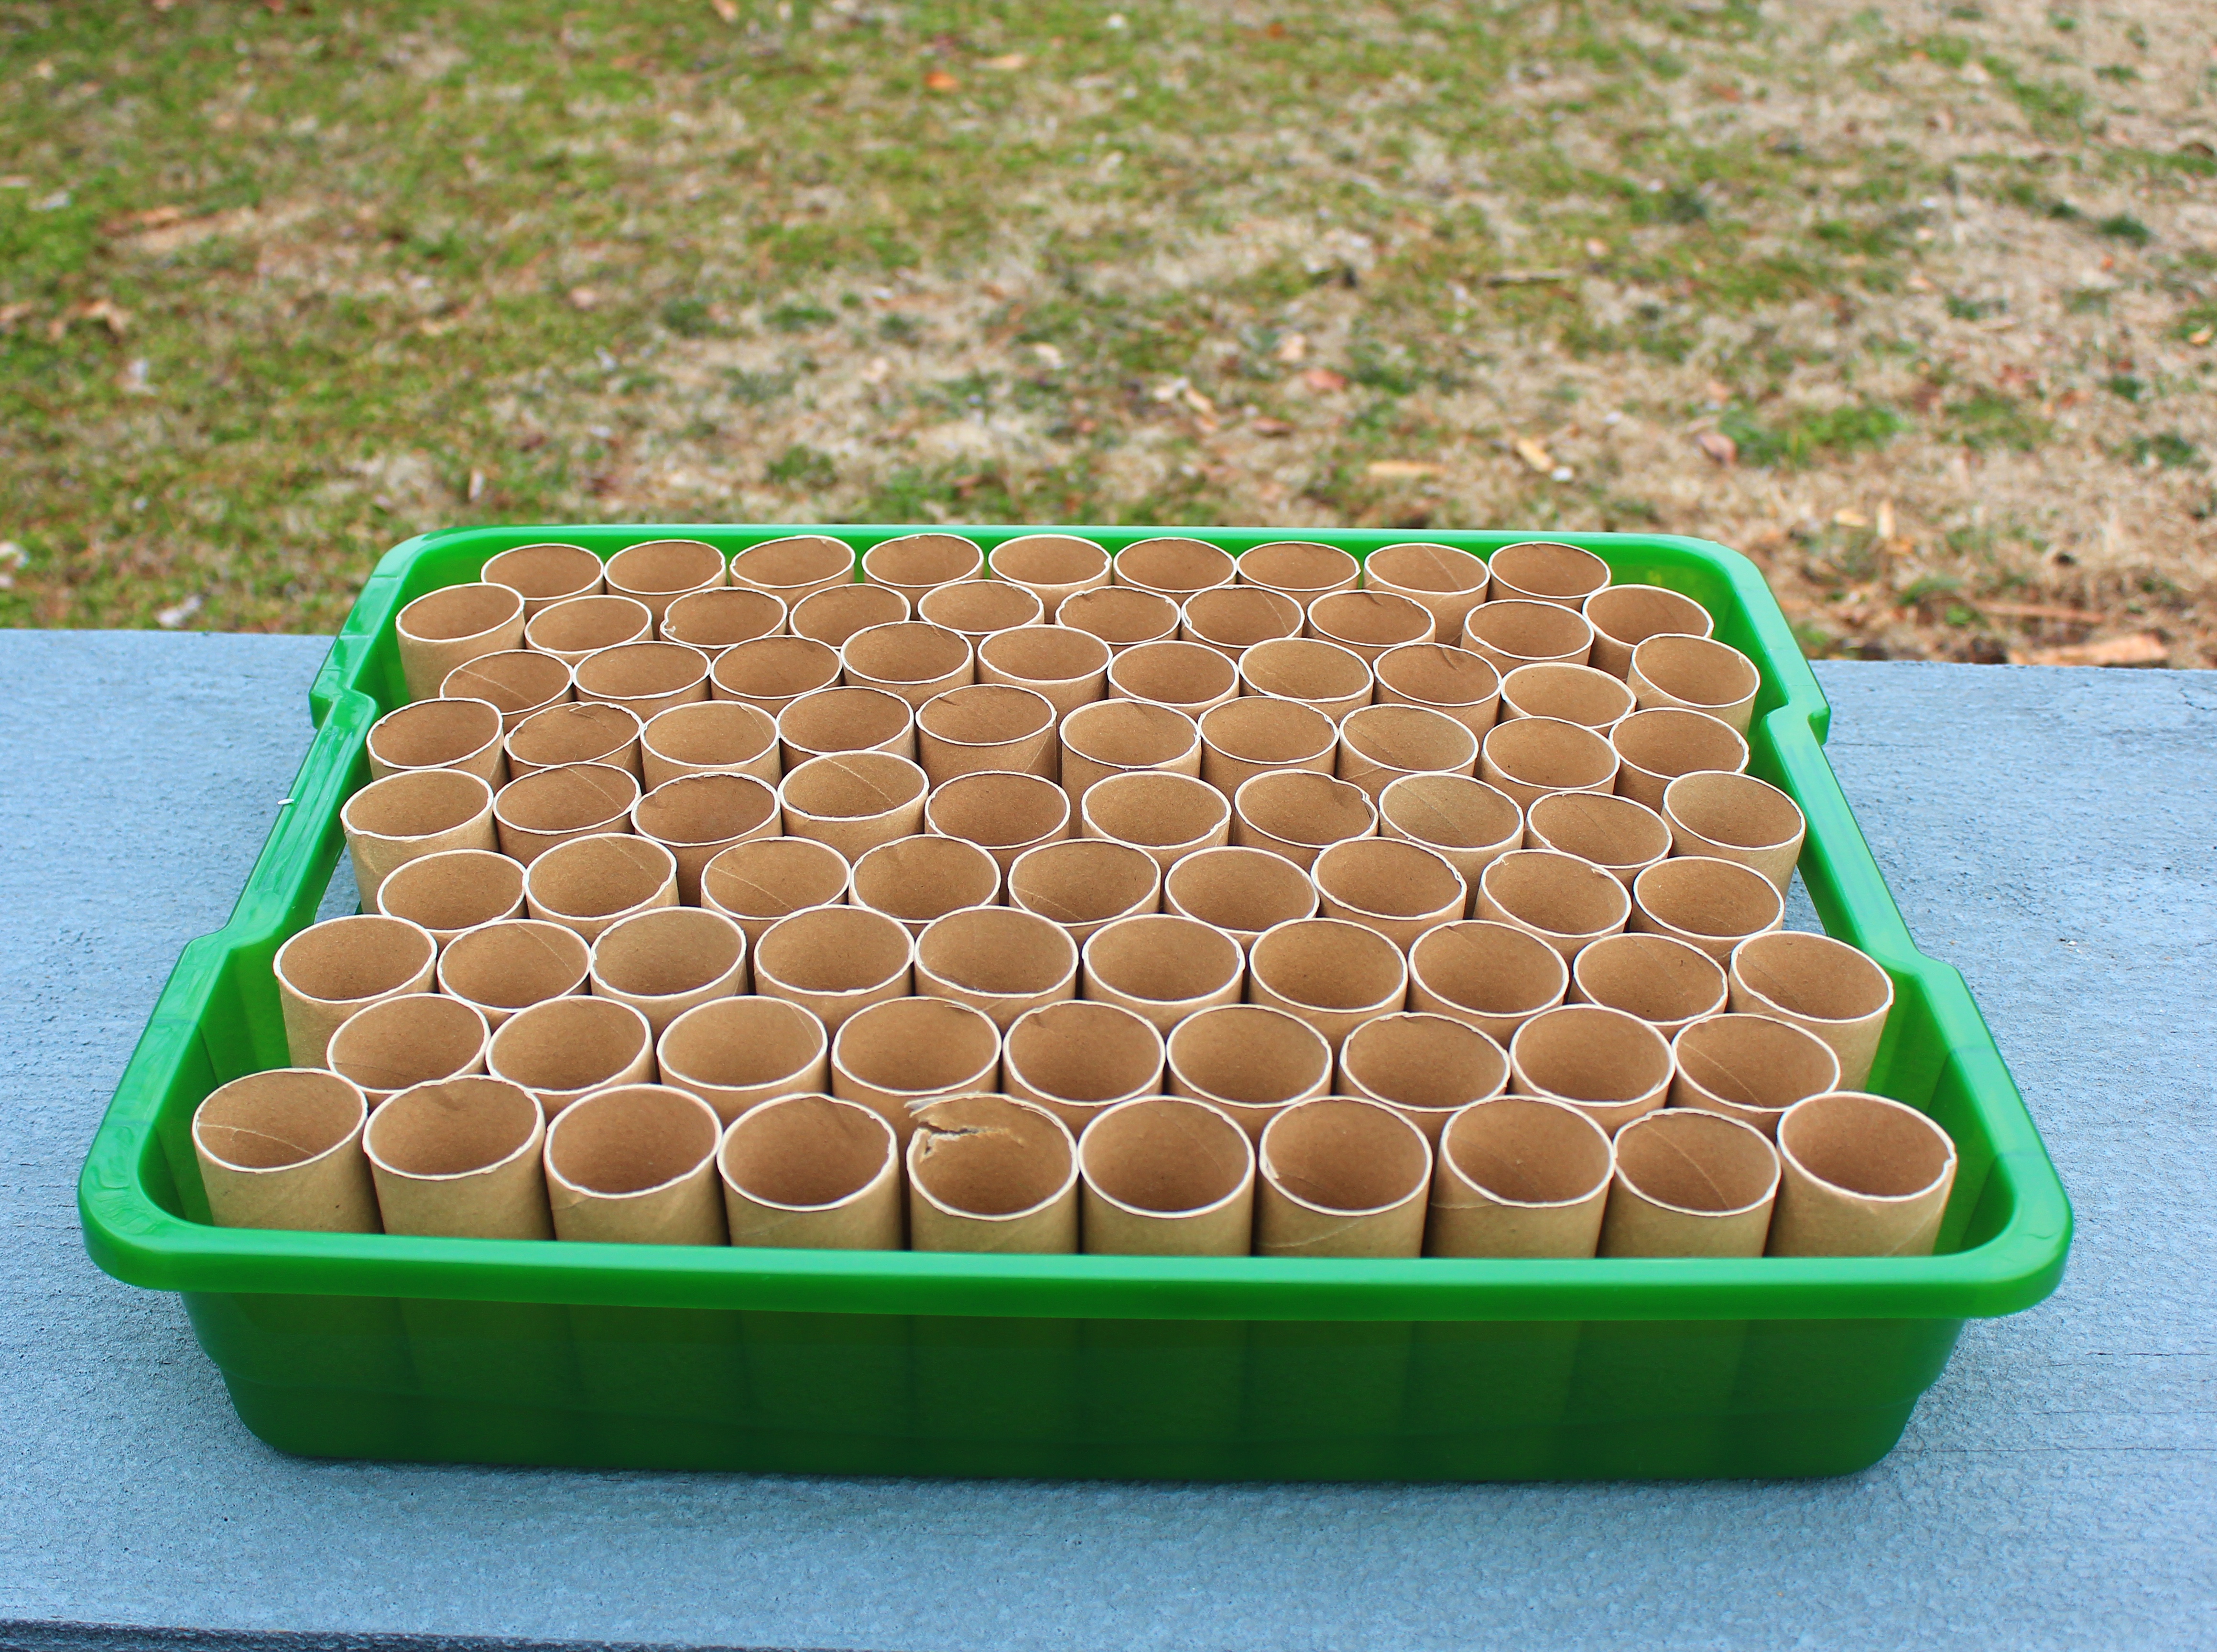
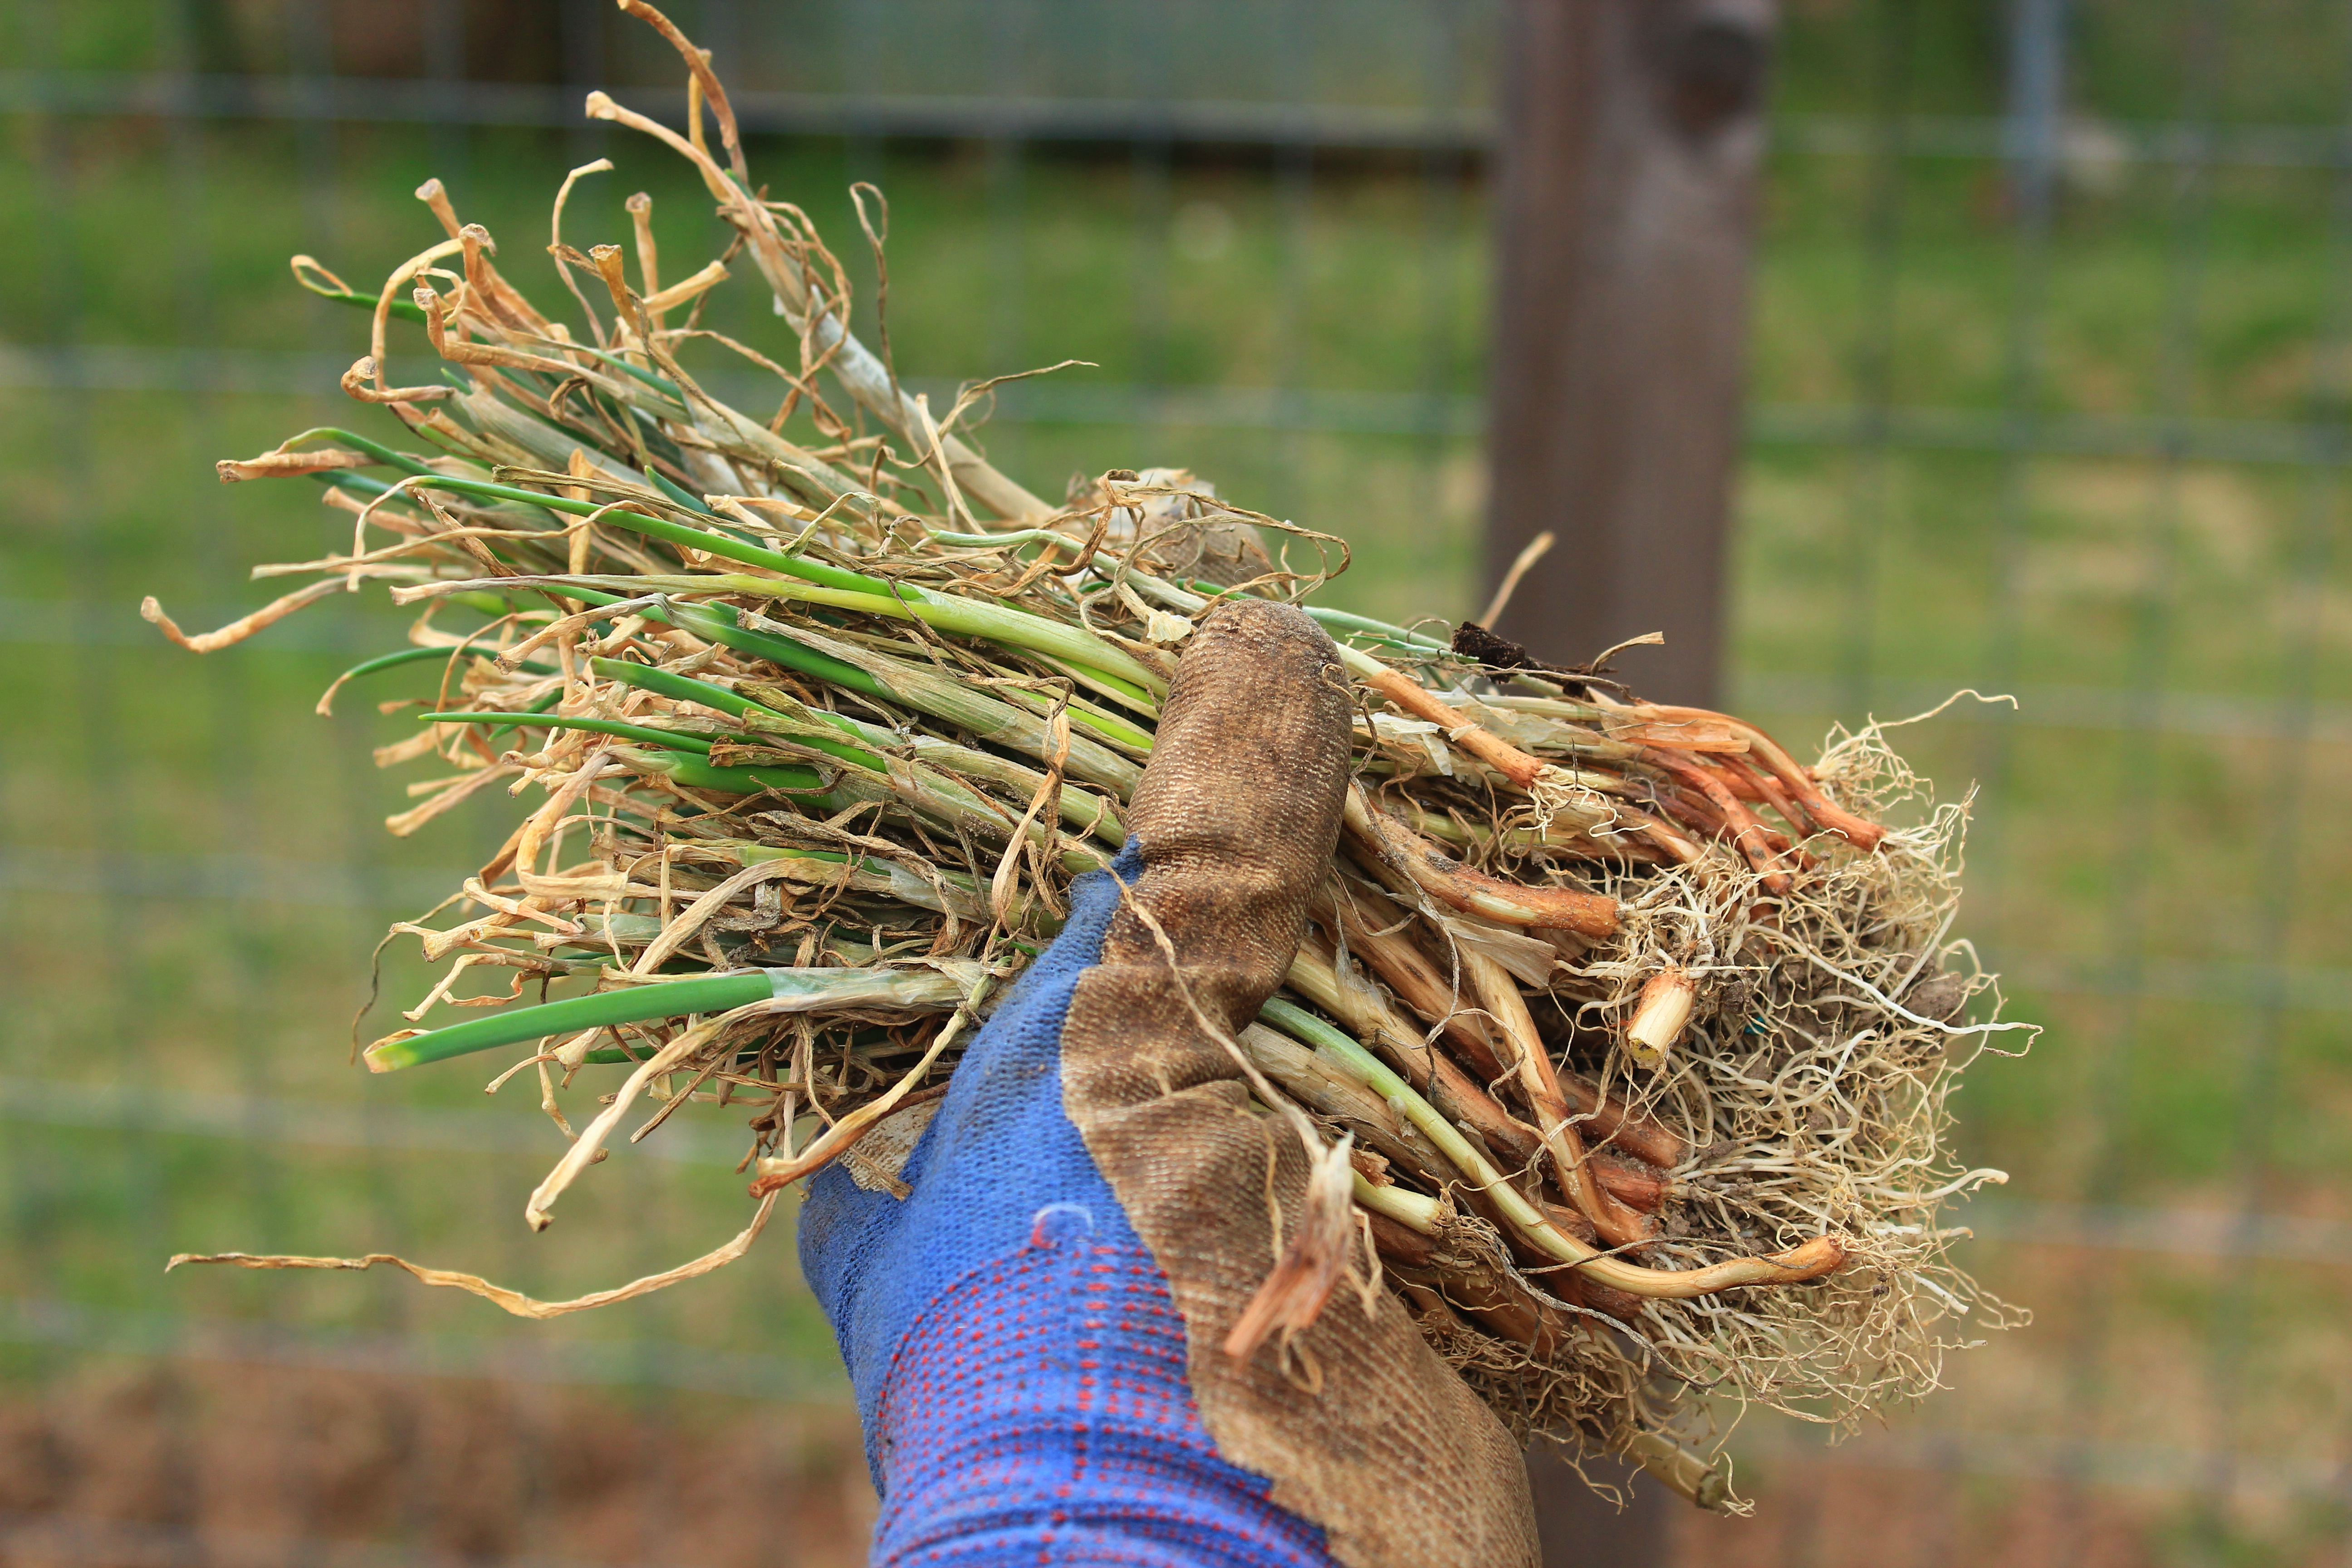
Most onions are grown from seedlings or sets. Seedlings are tiny onion plants, about 5″ long, usually tied in a bundle of 50 or more. They look like baby scallions. Sets are tiny, immature onion bulbs, like cocktail onions. I have yet to try growing onions from seeds, but perhaps one of these days I’ll get ambitious. There are certainly more varieties of seed available than there are seedlings or sets, but growing from seed takes more space and time and is more of a challenge. I’ve been happy with seedlings.

IMG_7118

Onions are photo-periodic, which means they require a certain number of daylight hours before they begin to form bulbs. There are three categories of onions. Long-day onions will not begin forming bulbs until the days are 14-16 hours long. These do better in the north (in North America) where the days are longer. Short day onions, which do better in the south, need 10-12 hours of daylight to bulb. Intermediate-day onions do well when daylight reaches 12-14 hours.

It also helps to know your latitude. Northwest Arkansas, where I’m growing, is at 36º N, so the best onions for me are intermediate-day onions which work well from 32-42º N. Luckily, the nursery where I got my seedlings knows this and orders onions that work best in this area. The varieties I’m growing are Super Star, the only white onion to win AAS distinction, Candy, which works almost everywhere in the United States, and Red Candy, a beautiful, sweet, mild red onion.

I learned a lot for this post from Dixondale Farms (http://www.dixondalefarms.com). They have been growing onions since the early 1900’s and supply onion plants to the entire country. From them I learned that the perfect onion has 13 rings. This also means that it has 13 leaves, since each ring is a modified leaf. Don’t worry, a smaller onion is not inferior in taste, it’s merely smaller. The more leaves an onion grows before the days get long enough to trigger it to begin forming a bulb, the bigger it will be.

I planted my onion seedlings on March 17th. First I made sure the soil was fairly pulverized, as Barbara Damrosch advises in her The Garden Primer, and then I made three long shallow furrows down the length of the bed. I sprinkled a balanced fertilizer into each furrow.

The fertilizer I used is Nitron’s (http://www.gardeniq.com) Nature Meal Vegetable Fertilizer (4-8-4). Those numbers correspond to the ratio of nitrogen, phosphorus, and potassium. This one is made from feather meal, bone meal, sulfate of potash, and alfalfa meal. I purchased it at Ozark Natural Foods (http://www.onf.coop).

IMG_7122

I spaced the seedlings approximately 4-6″ apart and used a hand cultivator to gently bring in soil around them, incorporating the fertilizer, until the row was planted. Then I firmed the soil around each little plant all the way down the row and watered them gently. I’ll keep an eye out for weeds because shallow rooted onions don’t like the competition and weeds can rob them of needed nutrition. I’ll also keep an eye on the weather and if it looks like we’re going to get another freeze, I’ll water them well, mulch them, and cover them with burlap for protection. I’ll mulch them anyway when they get about a foot tall to maintain soil moisture and keep down weeds. When they get about as big around as my finger, I can start to harvest some as spring onions, which will give the others more room to develop.

IMG_4737

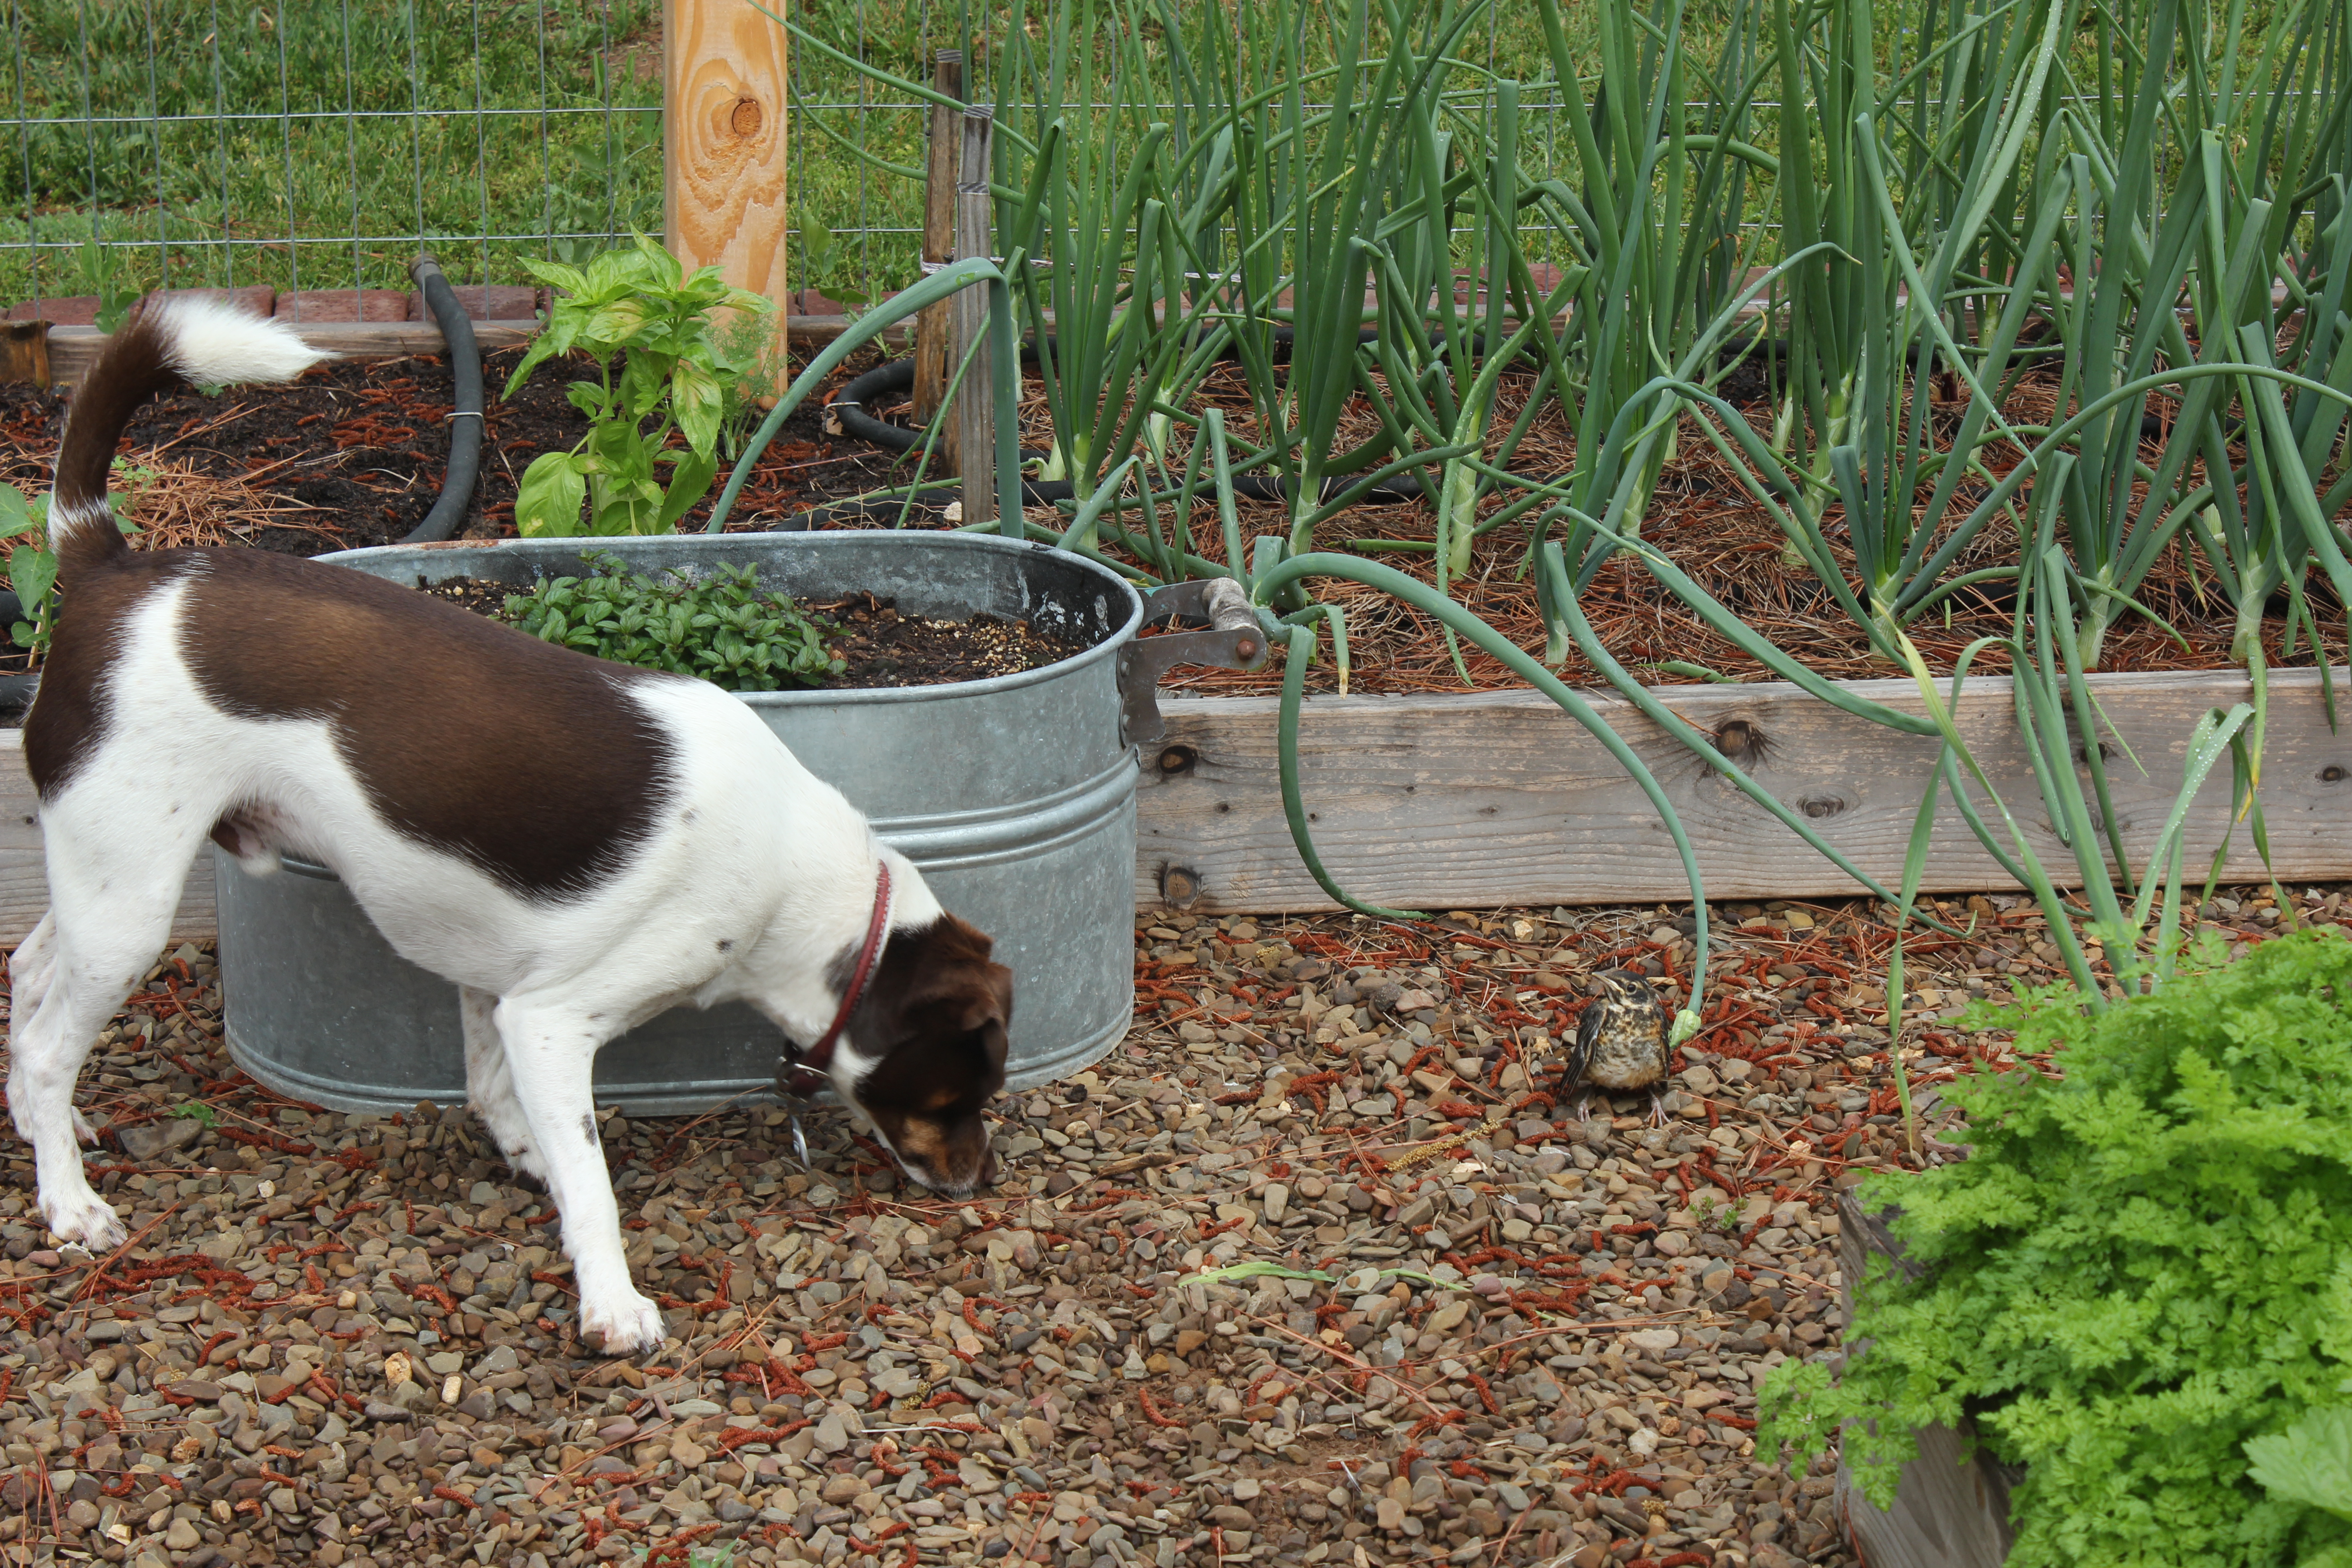
Another nice thing about growing onions is you can see what they’re up to. When the bulbs begin to form, their shoulders start to emerge from the ground, unlike, say, potatoes, where you’re left to wonder what they’re doing under there. Then in late summer, when the bulbs are done forming, the leaves begin to brown and fall over.

IMG_5273

Now you know it’s time to cure them for storage. Gently, (they may seem sturdy, but it’s important to be gentle with them as any bruised places will rot over time) remove them from the soil, and allow them to dry for a couple of days. This can be done in the garden, or if rain threatens, in a warm, dry, place. Next, find a dry place out of the direct sun with good air circulation and let them dry a good three weeks or so. You can then cut off the tops and store them in mesh bags, or even panty hose with a knot between each bulb, or you can braid their leaves together and hang them. Barbara Damrosch advises weaving in a strong piece of twine to help keep it all together. Keep them cool, dry and well-ventilated, and use any compromised onions and those with thick necks first. It should be noted that sweeter onions do not store as long as the more pungent varieties.

In the kitchen, onions are incredibly versatile. From France’s mirepoix, to Italy’s battuto, Spain’s sofrito, or cajun cooking’s Holy Trinity they are the humble beginning from which all else stems. They can be eaten raw in salads or sandwiches. They can be pickled. They can be stuffed and baked, sauteed slowly and pureed into a classic soubise, or allowed to release their sugars until they carmelize. They are essential in stocks, soups, stews, and casseroles. And is there anything more sublime than French onion soup?

IMG_6564

Every time I grill I cut one in quarters from the top down, keeping it intact at the base, then I wrap it in foil with olive oil or butter, or maybe some blue cheese and let it cook until the outside is almost burned, and the inside is meltingly sweet and mild. So good alone or with grilled meat. And what about onion rings? Or sausages with peppers and onions? Get outta here!

One of my favorite restaurant jobs was at a now-shuttered restaurant in Manhattan called Elettaria. It was a romantic, lamplit, cozy place with tiki-themed cocktails (27 rums on the menu!) and an open kitchen. Our chef, Akhtar, was of Indian origin and his food was laced with exotic Indian spices. I worked there from the day it opened until the sad sad day that it closed. Oh, the stories I could tell. I loved to watch Raphy scrupulously sharpen his knife and prepare the onions for the crab meat resala which was served with a turmeric laced soubise, (I’d also be hoping that he was making family meal). There was such zen precision to those perfect thin slices. I’ve thought about how an onion is cut ever since. Sliced, diced, minced, chopped, grated, it matters. Take your time with your onions. Prepping them and cooking them. If that prep makes you weep, make sure your knife is nice and sharp, or try refrigerating your onions before you slice them.

As Nigel Slater says in his gorgeous, passionate, wonderful Tender (2009), one of my all time favorite cookbooks, “Get the onion part of a dish right and you are halfway towards a good supper. Get them wrong and no amount of cooking and clever stunts can quite put matters to rights.” Amen to that, Nigel.

______________

In other news:

Everything survived the crazy hail storm on March 25th.

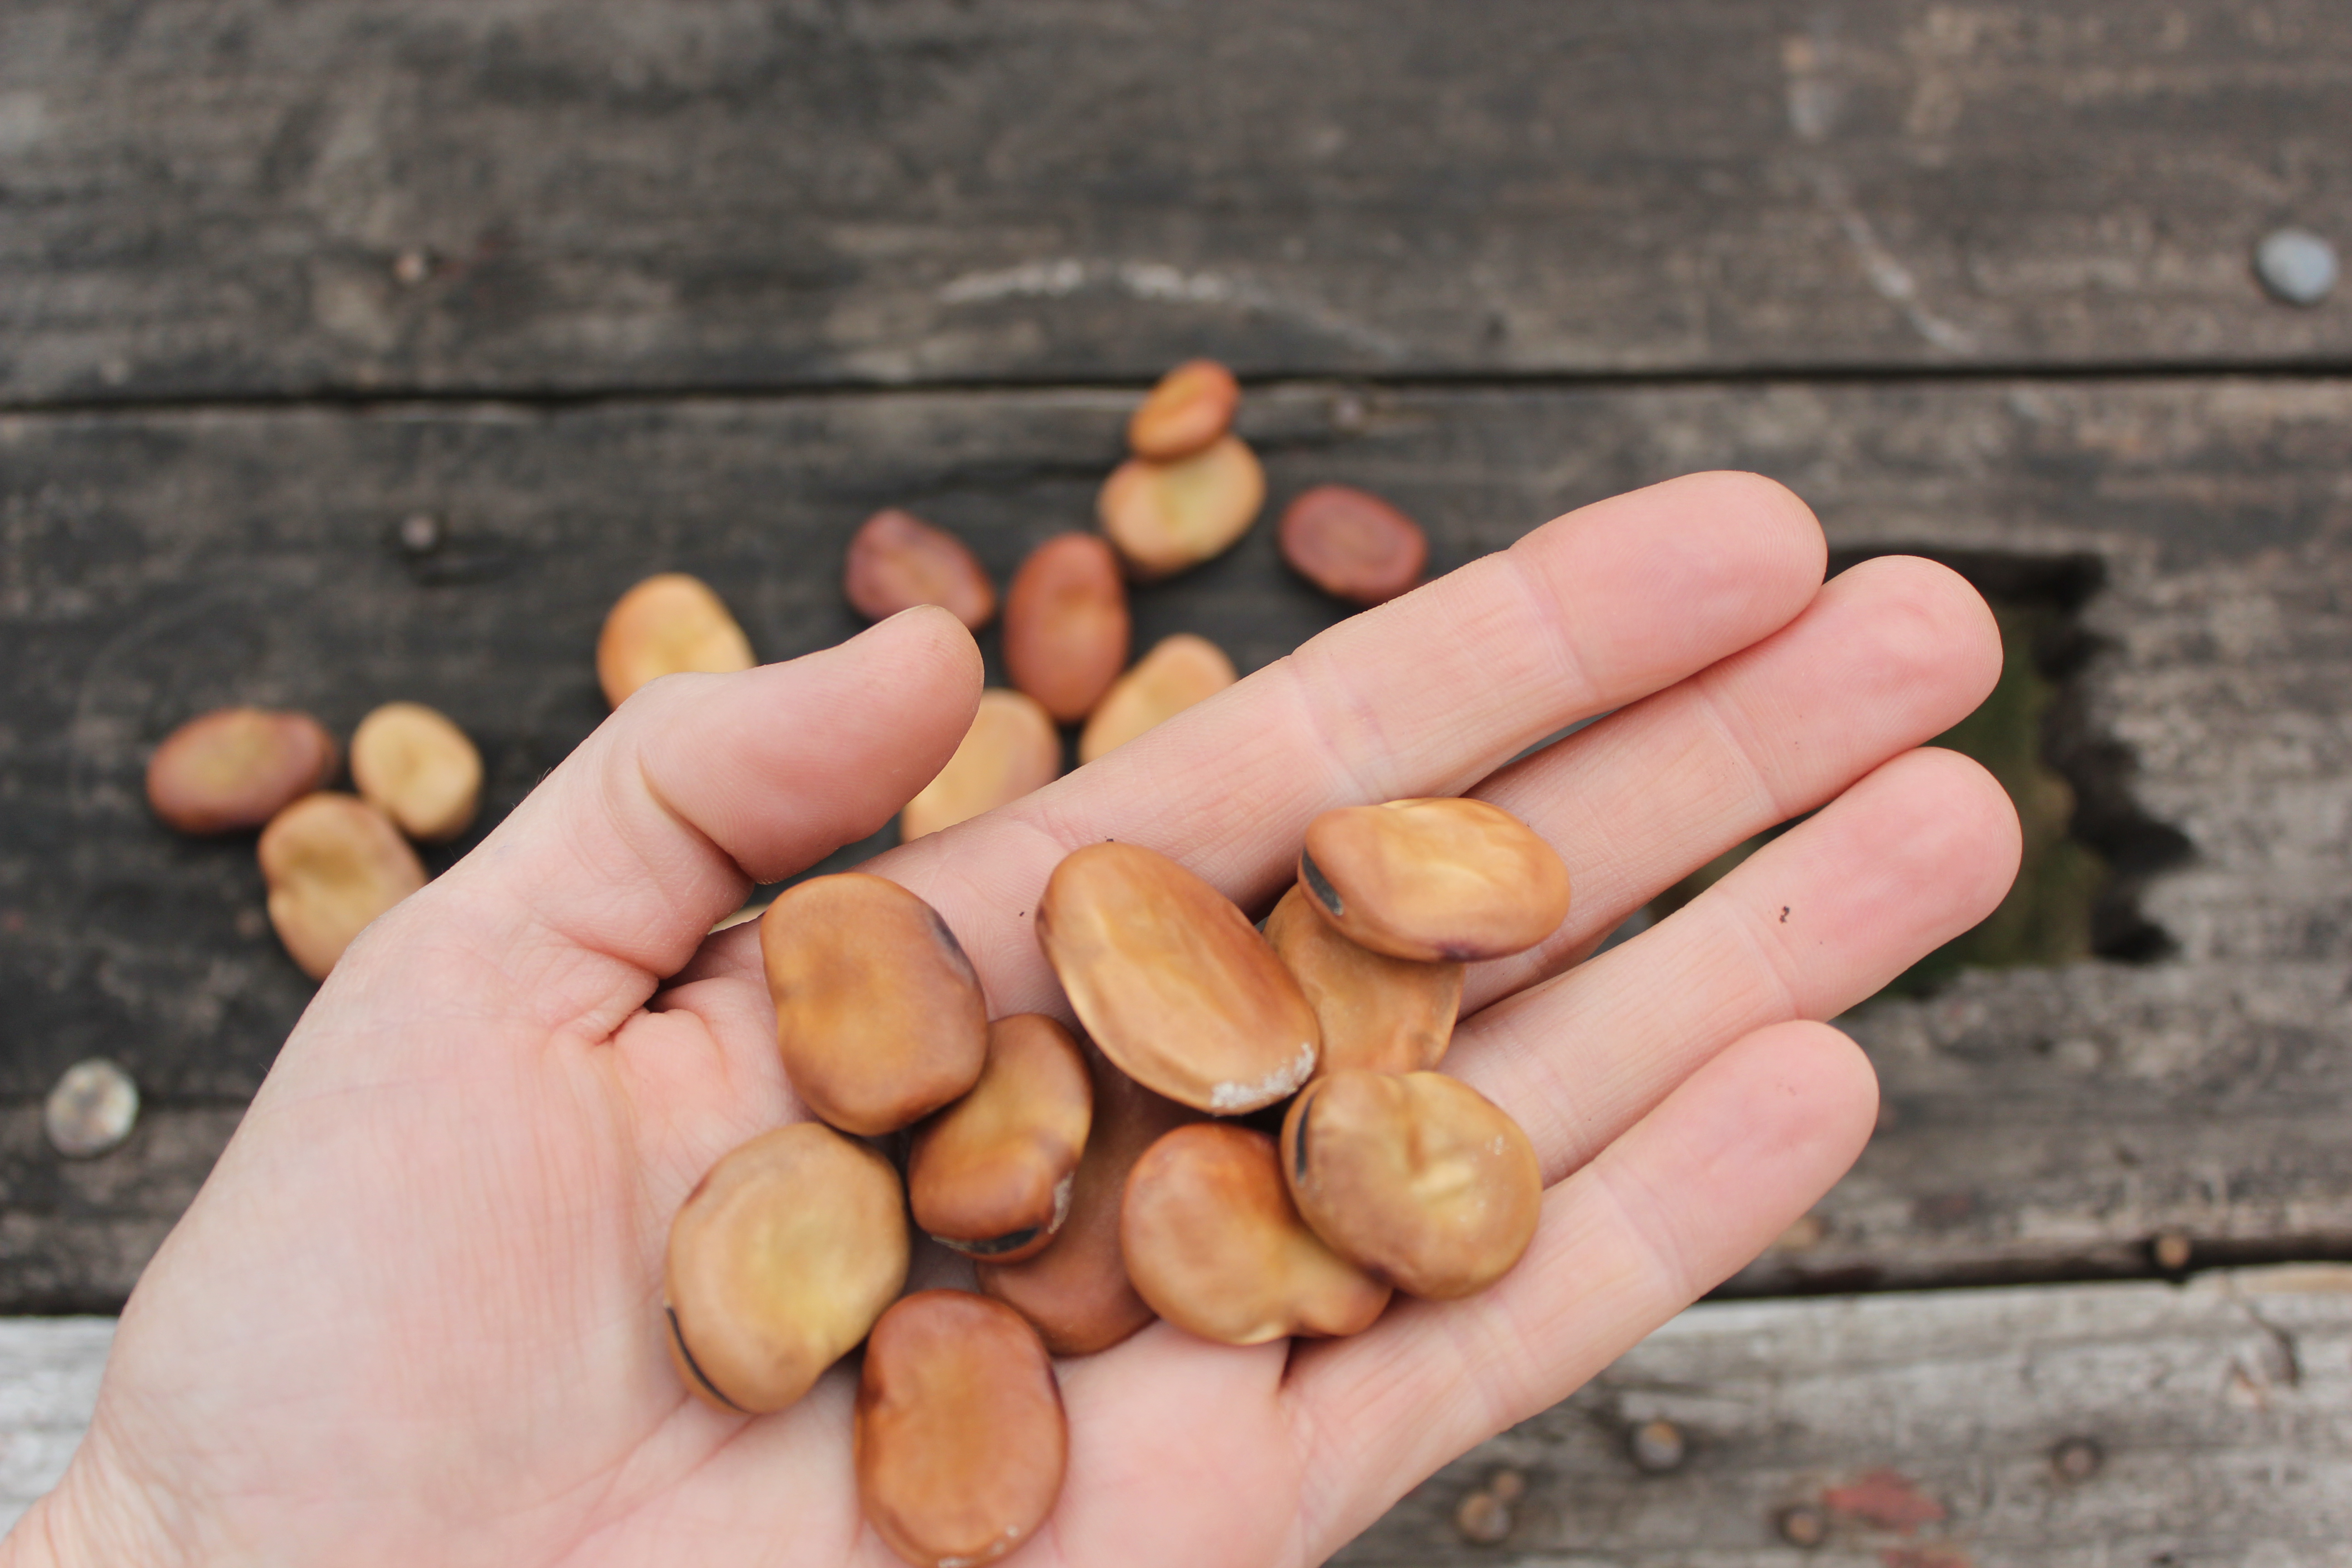
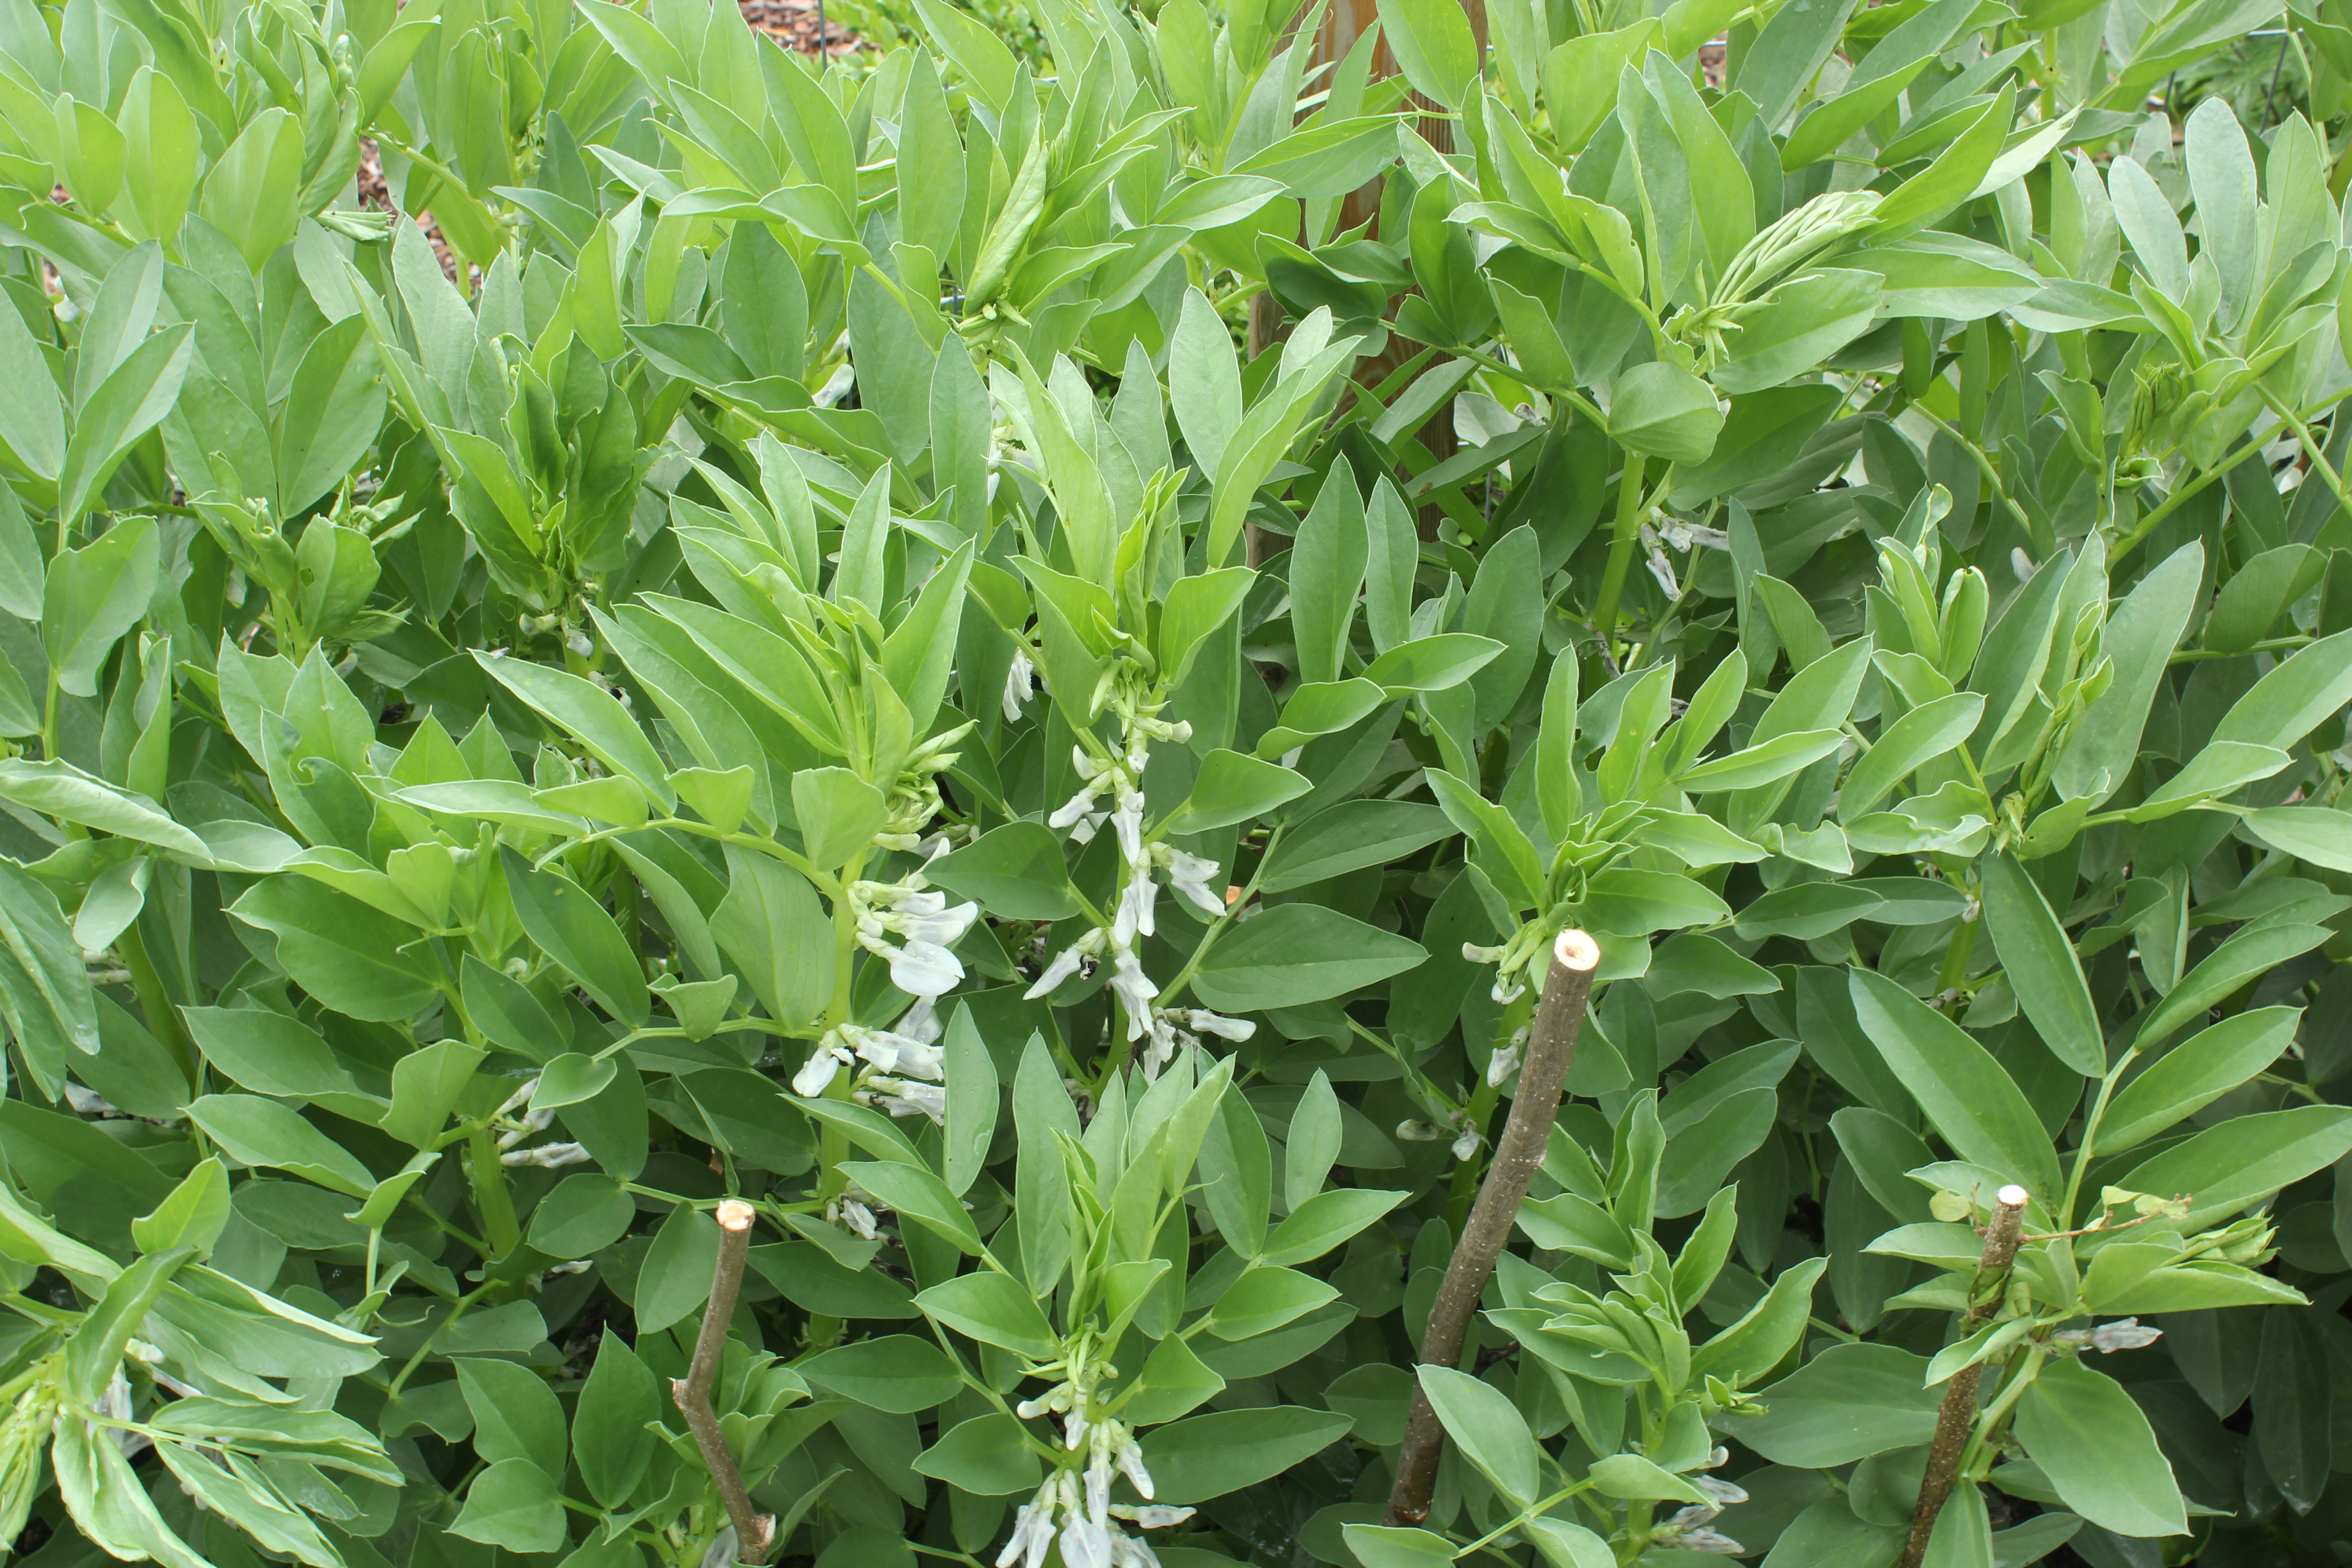
Beet, chard, kale, lettuce, arugula, broccoli raab, cavolo broccolo spiragriello, collard greens, spinach, and radiccio seeds have all been planted out. Pea and radishes seedlings are just starting to emerge and the fava beans are doing great. I planted some flat-leaf parsley plants in the leaf bed because I love it so and it’s challenging to grow from seed.

The perennial bed is slowly coming to life and the camassia and allium bulbs I planted last November have surfaced. I’ll take you on a tour of all that soon.

Asparagus spears are thrusting through the pine straw mulch! Too bad I can’t eat any until next year.

Seed potatoes from Seed Savers arrived in the mail and I’ll be planting them forthwith and telling you all about it next week.

I also MUST start tomato and pepper seeds. I should have started eggplants a month ago and I didn’t and that just has to be okay. You can’t win them all.

I hope everyone and their gardens are doing great, that you’re all happy, healthy, well-rested, and looking forward to your spring!

Namaste!

PEAS

IMG_4743

Peas are enchanting. And reason enough to have a garden. Their delicate nature, the fact that they start to lose their natural sugars once they’re picked, and their small window of availability makes growing your own a great way to insure that you don’t miss out on this early, rare treat of the garden year. And such lovely short term guests they are. So dainty and welcome with their pretty paired wing-like leaves, their sweet pale flowers, and their curlique tendrils. Those tendrils kill me. The way they seek and find and twine and draw themselves ever upwards. Emblems of curiosity and vitality. Like hope. In cursive. 

Circumnutation is the term used to describe this motion. It was coined by Darwin himself who was also fascinated by tendrils.

Peas, (Pisum sativum – sativum is Latin for cultivated) are one of the earliest domesticated plants (8000 BCE!). They also have the broadest range geographically and climactically of any legume, although they weren’t eaten fresh until the 16th century. These days a lot of fresh peas don’t even make it out of the garden, especially if my niece is around. (If you manage to end up with a glut of peas, please let me know.)

And because they express their genes consistently, Gregor Mendel used them in his experiments between 1856 – 1863 which laid the foundation for modern genetics. So, thanks again peas. 

The science of phenology tells us that the time to plant your peas is when the forsythia blooms. According to the Aldo Leopold Foundation (http://www.aldoleopold.org/Programs/phenology.shtml), “Phenology is a segment of ecology focusing on the study of periodic plant and animal life-cycle events that are influenced by climate and seasonal change in the environment.” Aldo kept records of the first occurrences of everything from blooms to migrating bird arrivals on his land in Wisconsin from 1935-1948 and these are chronicled in his seminal conservation treatise A Sand County Almanac (1949). His daughter Nina took up the work and kept detailed records of her own from 1976 until her death in 2011. These records, spanning 70 years, show that the first occurrences of certain songbirds and plant blooms are now up to three weeks earlier than when Aldo first began his observations. These records, and many more like them, kept by observant, organized, and generous souls, have important implications for the study of climate change, as well as for farmers, gardeners, and nature lovers. It’s fascinating, crucial stuff. Looking to nature for cues reminds me to be observant, as well as grateful, for the deep connection we share with every living thing. Turn,turn,turn.

IMG_4744

These days we recognize three kinds of peas. English, or shelling peas, which are the familiar peas in a pod type from which the peas are removed and eaten. Snow peas, (P.sativum var. saccharatum), which are flat and eaten whole and are sometimes called Chinese peas because they are so often found in stir frys. And snap peas (P. sativum var. macrocarpon), which are a relatively recent cross of the two. Snap peas have sweet edible pods with fat round peas visible inside. These latter two are sometimes called mangetouts, or French for “eat all.”

This year I’m trying two kinds of English peas. Lincoln is a high-yielding, heat-tolerant, delicious pea that was introduced in 1908. I saved seeds last year, so I’m hopeful that these will perpetuate themselves. I’m also trying Iona Petit Pois which are tiny French peas, about half the size of regular shelling peas and are reported to be an exceptional treat. I can’t wait to find out. I’m also trying Sugar snap peas for the first time. This variety was an AAS winner in 1979, with 5-6′ vines and exceptionally sweet pods. Snap peas are reportedly more heat tolerant than English peas, so hopefully that will extend my season of peas.

All peas are incredibly nutritious. They are good sources of protein and fiber while being low in calories. They have high concentration of vitamins A, C, K, and folic acid, as well as phytonutrients, anti-oxidants, and minerals such as calcium, iron, copper, zinc, manganese, and phosphorus. The edible pod types are even lower in calories, but hold more vitamins and minerals than the shellers. The shoots, which include the leaves, stems, flowers, and tendrils are also edible and nutritious and can be lightly steamed or sautéed, or eaten raw in salads. Shelled peas can be eaten raw or tossed into rapidly boiling water for a mere three minutes. If you manage to resist eating them, they can be added to salads or risotto. Or you could make a lovely spring soup.

Well, the forsythia is blooming so it’s time to plant some peas! I planted mine close together against my garden fence, in two rows about 2″ apart and 1″ deep. I had planned to make some supports perpendicular to the fence, but David got worried about shade, so we’re just going to let them climb up the fence and give them something more to climb on later if they need it. Pea vines are very delicate, so I’m going to leave them alone to do their thing. The favas are already planted in front of them, so I’ll have no reason to disturb their ascent. I just hope they appreciate all this rain and don’t decide to rot!

I also planted some sweet peas. Flora Norton are clear blue sweet peas with an intoxicating fragrance. I saved these from last year and planted them all along the garden fence behind the perennial beds. They make a delightful cut flower too.

IMG_5043

IMG_4878

When it’s time to harvest peas, I’ll start from the bottom up, since that’s how they mature. It’s important to keep up with them because they can start to lose their sweetness quickly, plus harvesting speeds up production. I’ll use my trusty harvesting scissors to avoid damaging the delicate vines, and I’ll get definitely get my niece in on the action.

IMG_3176

SPRING PLANTING

St. Patrick’s day or not, Tuesday, March 17th was a big day in our garden. David and I both had the day off, it was warm and sunny with rain scheduled for the next day, and the soil was finally workable.

Do you know this term, workable? Many early seed packets will tell you to plant them “as soon as the soil can be worked.” This means that the ground is not frozen, and that it’s not too wet. Timing is tricky in the spring because you want to get stuff in the ground, but if you mess with your soil when it’s too wet you can seriously damage the soil’s fragile structure, causing it to clump and compact, something that is not easy to fix. Structure refers to the way soil hangs together, the relationship between the particles of soil and the pore space between them.  This relationship is crucial to your soil’s ability to hold moisture and air, for roots to grow through it, and for the millions of creatures living in it. Structure is different than texture which refers to the relative amounts of different sized mineral particles present in your soil (sand, silt, or clay). 

Soil is amazingly complicated stuff and is worthy of our deepest respect, but let’s not get into that right now. Suffice it to say that the timing was right and Tuesday was the day.

Incidentally, the best way to improve your soil’s structure is to add organic matter which also feeds your plants and enhances your soil’s capacity to hold moisture.  This is a task that is best done in the fall (because of those spring timing issues), but we didn’t get to it last fall, so we did it Tuesday.  Better late than never.

As a conflicted American consumer, I can find a million things to feel guilty about. When I lived on the East Coast in an apartment with an outdoor space, but no dirt, and no compost situation I never got used to not composting. For seven years, every time, seriously, every time, I threw food in the trash it bothered me. So one of the first things I did at my new place was establish a compost situation. It’s a pretty simple set-up, but I sleep better for it.

IMG_7075

The enclosed middle compartment is this season’s working compost. That’s where I put kitchen scraps, yard waste, leaves, judicious amounts of ashes from the fireplace, etc. The left side has wire around it that you can’t really see, I put leaves in there (I should add more to it), the other side is where last year’s compost got turned so I could start a new batch in the middle. I’m not a master composter yet, but I aspire to be, and I actually made a batch of compost last year, which feels like a major step on the road to a self-sufficient closed-loop garden. We weren’t sure if it would be enough to add some to all of our beds though, so David got a scoop from Nitron (www.gardeniq.com) to supplement.

IMG_7076

Then, while I was planting carrots and radishes, David, Mountain Man that he is, did the heavy lifting and wheelbarrowed compost into all the beds. Then he mixed it in and we were ready to plant!

CARROTS and RADISHES

IMG_3165

I started with carrots and radishes because that bed was already prepared from when I planted garlic in it in November. At that time I added compost and worked it in and made sure that the soil was nice and friable. Carrots like loose soil, which makes sense if you’ve ever seen a crazy knobby two-legged carrot come out of hard rocky soil. I have nothing against those carrots, I love the way they are physical embodiments of the journeys they’ve taken, but I still made sure my soil was loose and light as far down as a carrot might grow. Then I made a shallow furrow across the bed.

Carrot seeds are tiny and it always seems like the wind starts blowing right when you want to plant them. (To avoid frustration, it’s also a good idea to open your seed packets indoors when your hands are clean and dry.)

IMG_7094

I sprinkled them as sparingly as possible down the furrow. Because they’re so light, it’s hard to plant them thinly. One of the tricks of growing good carrots is thinning them. I’m happy that anything wants to grow in my garden, so it can feel ungrateful to pluck out tiny seedlings just as they’ve seen their first light, very Sophie’s Choice. But if you want nice carrots, that’s the sacrifice, so when these puppies get 1-2” high I’ll snip some off at the soil line. Then later I’ll try to thin them so they’ve got space around them about the size of a mature carrot with a little room to spare, hopefully I can eat those tiny thinnings.

I spent a lot of time trying to decide which carrots to plant this year. I finally narrowed it down to three: St. Valery, an ancient orange carrot with very high reviews for taste, Amarillo, a neon yellow carrot with a reportedly sweet taste, and Purple Dragon, a spicy, purple carrot with a deep yellow core. Then Baker Creek sent me some free Parisienne carrot seeds, which I had been curious about, so I’m trying them too. They are little round carrots, which makes them a good choice for less than perfect soils. It sounds like Baker Creek sent them free to everyone, and made them a lot of fans. I look forward to roasting them whole.

Carrots take a while to germinate and because I have a small garden, I’m always looking for ways to save room, so I like to plant radishes with my carrots. Radishes are quick. Once they germinate they provide shade for the slow spindly carrot seedlings. They also break up the soil for the carrots and are long gone before the carrots even get going. 

Radish seeds are bigger and easier to control. I placed them about 2” apart, then I carefully knocked a very light layer of soil over them and patted that down gently. I watered them with a watering can and then covered them with strips of burlap and watered those too. When the radishes germinate in a few days I’ll take off the strips and let the radish seedlings nurse the carrots along, keeping them all moist until it’s time to eat radishes! I’ll probably try to find room for some more carrots elsewhere and plant those in a month or so.  And once I’ve eaten the ones I just planted, I may plant some more there. Successive planting is a great way to make sure you have a crop all season. 

IMG_7103

Below is the root bed on May 23rd last year. You can see the carrots peeking out from under the radishes in front. That’s chervil in the very back of the bed with bigger leaved parsnips in front of it. In the bed behind are onions. Chervil is a great spring herb and I need to get some planted for this year! It’s a lovely, delicate, cool-weather herb, like a feathery parsley with hints of tarragon.

IMG_4747

IMG_7095

Wilson loves carrots. I told him it would take a while, I hope he’s not waiting for them.

FAVA BEANS

Remember these guys? Here they are March 11th, eight days after being planted.

IMG_7025

Inquisitive little things, aren’t they? Like little Loch Ness Monsters. Each checking out the situation in their own way. “Hi, have you gotten the schedule yet? What’s next?”

IMG_7022

And busy! We went away for the weekend and came back to these rowdy teen-agers. 100% germination!

IMG_7107

They got caught in the rain earlier in the week and were wetter than I wanted them to be, plus they were starting to get a little moldy. David took one out to examine it and saw that they had crazy tap roots, so we decided we’d better get those kids in the ground!

Their root systems really are amazing. Look at this action! Exquisite!

IMG_7112

And yes, I realize the whole point of the loo rolls was to leave them in place and not disturb that elaborate ladder of a root system, but then I read in Barbara Damrosch’s indispensable The Garden Primer (1988), that she had noticed when she pulled up spent crops in the fall that often the peat pots they were planted in were still quite intact. Ultimately, I decided to carefully remove the loo rolls (I put them in the compost) and plant them gently in deep holes. Luckily they got nicely rained in and so far they look really happy.

On to the next!

HARICOTS TARBAIS and CASSOULET

Brace yourselves this is a long one, (but there are lots of pictures).

Growing your own food is elemental.  To place a seed in the ground, nurture it, and watch it grow into something that can sustain you is to participate in a miracle on the deepest level.  It is an act that ties you to the seasons and to the earth.  Homegrown organic vegetables not only taste better than conventionally grown store bought ones, they are better for you too.  Yet as poetic as the desire to grow your own can be, it can stem from practical concerns as well.  Some vegetables are expensive.  Others are next to impossible to find.

Take the French white bean ‘Haricot Tarbais’. 

IMG_3510

This creamy white, thin-skinned, low-starch bean is said to be the soul of the classic French peasant dish cassoulet.  Cassoulet is a hearty, meaty, quintessentially winter dish, originating in southwestern France.  A forerunner to that classic American pairing Pork and Beans, if you will.  It is named after the cassole, the vessel in which it is traditionally cooked.  A cassole is a deep, round, covered casserole dish, shaped much like a short, fat flower pot.  The beans are cooked for hours, sometimes under a crust of breadcrumbs, with a variety of available meats, often including duck confit, sausage, and ham.  Cassoulet is one of those regional dishes, like American barbeque, that people have very strong opinions about.  The few cassoulets I’ve had in my life have been at French restaurants in Manhattan, and as different as they were, they were each an experience.  Eating cassoulet takes me somewhere.  Somewhere rustic and French and cold.  Austere but gorgeous and welcoming.  When I saw ‘Haricots Tarbais’ seeds offered in the Baker Creek Heirloom Seed catalog two years ago, I knew not only that I had to take that trip, but that eventually this day would come and I’d be making my own cassoulet.

IMG_3507

I have worked at my share of restaurants (I was an actor in a former life).  From LA to NYC, I have been exposed to cuisines from all over the world prepared by talented, passionate, inspiring chefs.  It’s made me an ambitious, if not proficient, home cook.  Having my own vegetable garden to draw from has taken that, in the parlance of our times, to a whole nother level.  It allows me to grow a crop with a particular dish in mind.  I find this especially thrilling.  True satisfaction can be hard to come by these days, but sharing with friends my first cassoulet from beans that I grew myself was the essence of satisfaction.

IMG_6249

GROWING BEANS

Growing pole beans makes me feel like a rock star.  I find it immensely rewarding, though I’ve only scratched the surface in terms of varieties and yields.  Shelling beans are their own seeds, so what you plant is what you get.  And they are sown in place rather than started indoors which is so much easier.  Plus, like Jack’s beanstalk, they climb, which saves valuable space in a small garden and gives you a third dimension visually.

The first year I had my garden I fashioned these towers out of bamboo.

IMG_2059

They remind me of Gilligan’s Island.  Anyone fancy a Mai Tai?

Here’s why growing beans make me feel like a rock star.

July 28th, 2013.

IMG_2092

August 6th.

IMG_2609

August 21st!

IMG_2832

Guitar solo!!

I was obsessed with towers, or tuteurs as the French call them, for a while there.  I sketched them.  I scanned the horizon for them.  I dreamed about them.  I made a Pinterest board.  Ultimately, because I live in a ranch style house, I decided I wanted mine to look more like oil derricks than the Eiffel tower.

 Last spring David made me these.

IMG_4302

I adore them!  Here they are fulfilling their potential.  That’s our star ‘Haricot Tarbais’ on the front tower.

IMG_5266

IMG_5894

IMG_5863

Last year I direct-sowed beans on April 27th.  Unfortunately I planted potatoes in the same bed on April 2nd and they were already growing like gang busters.  The beans had trouble initially because they were shaded by the potatoes, but eventually they found their purchase and up they went.  Live and learn.

IMG_4816

Many vegetables are revered because they have a small window of seasonality.  Asparagus, peas, that perfectly ripe summer tomato, we appreciate these things because they are fleeting.  But the fabulous thing about beans is that you can store them.  Beans will get you through the winter.  They are so easily grown and so durable that they have traversed the globe and have been fundamental to human civilization.

The history of beans is a fascinating one.  I am currently devouring Ken Albala’s immensely compelling, “Beans A History” (2007), I highly recommend it and will continue to share with you what I’m learning from it.

Incidentally, he points out that in 2000 the Tarbais bean was awarded IGP (Indication Geographique Protegee) status, “which delimits where it can be grown, with what fertilizers and pesticides and protects the name legally”, similar to Champagne, or Parmesan Reggiano.  So maybe I should be calling them by another name?

Another obsession.  Jars.  I love them.  And I love them best when they are filled with beautiful, colorful, nutritious beans!  I find a pantry stocked with jars of beans, grains, dried peppers, and spices a thing of great beauty and solace.  It declares, “As God is my witness, I’ll never be hungry again!”

IMG_5665

CASSOULET

IMG_7003

I still had about four cups of Tarbais beans and winter was running out.  I invited people over and kept checking the weather, hoping that Sunday’s would be dismal.  Time to make cassoulet!

Cassoulet is not difficult to make, but it does take several days (as does reading this post!).  I started, as I often do, with research.  Like many cooks I know, I like to peruse a number of sources for ideas, inspiration, and techniques, and then wing it.  My main sources for this cassoulet were Anthony Bourdain’s Les Halles Cookbook: Strategies, Recipes, and Techniques of Classic Bistro Cooking and David Lebovitz’ My Paris Kitchen: Recipes and Stories.  If you don’t know David Lebovitz, please check out his beautiful blog, http://www.davidlebovitz.com, and buy his cookbook, he is an inspiration.

Early in the week: Gather supplies.

One of the few things I miss about living in a big city is access to great grocery stores (yet another reason to grow your own).  Luckily, we have Richard’s, which is a solid meat market.  They had duck legs (frozen), rendered duck fat, a nice smoked ham shank, Italian sausages, and rosemary.  I already had garlic, thyme, bay leaves, gin, nutmeg, and allspice.

IMG_6904

Tuesday, Duck Confit: When the duck legs were thawed I poked them all over with a needle and then rubbed them with sea salt, a bit of allspice, and a few gratings of fresh nutmeg.  I packed them skin side down in a Pyrex dish on top of the rosemary, some thyme, three bay leaves, and about six cloves of garlic.  (David Lebovitz’ trick is to really pack them into the dish, or two dishes if necessary, with no space around them so that when the fat is rendered it makes a quick confit.)  I dribbled in a tablespoon of gin, covered them with plastic wrap, and refrigerated them overnight.  The next day I turned them skin side up, placed them uncovered in a cold oven, and turned it up to 300°.  I cooked them for 2 ½ hours, occasionally basting them with their fat and juices.  Then I turned the oven up to 375° for about 15 minutes to let the skins get crunchy.  I let them cool and then covered them with parchment paper and then aluminum foil and refrigerated them for a couple of days until I was ready for them.

Friday:  I picked through the beans and discarded any that weren’t up to par.  Then I soaked the beans overnight in enough water to cover them by a couple of inches.

Saturday:  Cooking the beans.

IMG_7012

(Shout out to my mom for giving me this gorgeous copper stock pot for Christmas!  Thanks Mom, I love it!)

I drained the beans and put them in my gorgeous copper stock pot with the smoked ham shank, three peeled carrots, a quartered onion with a clove stuck in each piece, a couple of bay leaves, some thyme, about six cloves of peeled garlic, and several grinds of fresh black pepper.  I cooked them until they were tender.  Which took about two hours.  Maybe more.

 One of the reported wonders of the Tarbais bean, and the reason they are the heart of this dish, is that they can stand long cooking, becoming incredibly creamy and tender, while still maintaining their integrity.  They did not disappoint.

I took the ham shank out of the beans and put it aside to cool.  Then I prepared the other components.

I heated up my trusty cast iron skillet and placed the duck breasts skin side down to really crisp them up, I flipped them over for a minute and then set them aside to cool.  I poured off some of the fat and then cooked the sausages in the rest of it, not fully, just to brown them up.  I set them aside to cool with the duck.  Then I sliced up an onion and cooked it in the remaining fat and juices.

I fished the bay leaves and thyme out of the beans and discarded them.  I fished out the carrots, cut them up and put them back in the beans.  I tore the meat off the ham shank, cut it into bite sized pieces, and put that back in the beans.

I fished out the onions and garlic that hadn’t melted entirely and whizzed them in my blender with some of the bean juice, the onions from the skillet, and just a little salt.  Then I poured this puree into the beans.

I sliced up the sausages.  I separated the drumstick from each duck leg and cut the remaining piece in half.  Then I tasted it.  Credit must go to David and Anthony and the duck legs themselves, but it was one of the best things I’ve ever made.  Meltingly delicious.  I will definitely make duck confit again.

Time to assemble!

Oven preheated to 300°.

I don’t have a cassole, so I used my 8 quart dutch oven.  I covered the bottom with beans, layered in half of the sausage and duck, more beans, the rest of the sausage and duck, and finished with the rest of the beans.  Then I mixed a cup of panko bread crumbs with a tablespoon of olive oil and covered the beans with that.  Into the oven with you!

Cracking the crust of the cassoulet several times while cooking is one of the aspects of cassoulet on which there is much debate.  I only cracked mine twice.  I let it cool fully and refrigerated it.

Then I whipped up some Pear, Riesling, and Ginger Sorbet, to serve topped with prosecco as a refreshing, palate cleansing dessert.  http://www.seriouseats.com/recipes/2014/01/pear-riesling-and-ginger-sorbet.html  and went to bed!

When I have people over I always get carried away.  I’m usually tipsy, two hours behind, and still standing over the stove in pajamas with dirty hair when my first guests arrive.  I madly put those unfortunate souls to work while I put on pants.  Lucky for me, the French believe cassoulet is best if served réchauffé, or reheated.  This made party day a piece of cake.  My house was clean, I was clean, the fire was blazing and the candles were lit.  Come on in!

IMG_6250

Thanks Janine for the party day pictures!

GARDEN STRUCTURES

Hello March!  It was 37 degrees on Monday, but I still ended up spending a good two hours in the garden.  I needed to be out there so badly I didn’t even notice the cold.

David got productive much earlier, leaving me at my desk.  About the time I was getting onto myself for not getting more done, he returned from the hardware store with a trailer load and I finally got motivated.  He had PVC pipe, rebar, and a 16’ cattle panel.  I’m not a fan of PVC, but I want a hoop house to put over my (4 x 8’) leaf bed.  Last year I used bamboo from my sister’s house and it worked pretty well, although the branch stubs tore the fabric in places and she has since moved, so I no longer have a source for young pliable bamboo.  Anyway, he got 4 – 10’ pieces of grey 1/2” PVC and 8 – 2’ pieces of 3/8″ rebar.  He pounded the rebar into two corners of the bed, stuck a PVC pipe over it on one side and carefully bent it onto the other.  Six more pieces of rebar, three more bends, and voila, tunnel supports.  All in all it cost under $20. 

IMG_6907

IMG_6932

I’ve still got some Agribon+ AG-19 floating row cover fabric that I ordered from Johnny’s Seeds last year.  It’s 83” wide and I have about 40’ left of it.  I’m going to cut it in half lengthwise and sew two long sides together giving me a piece about 20’ x 14’ which will be perfect.  I’ll put that over the top first.  It will provide frost protection down to 28 degrees as well as insect protection.  It lets 85% light through and is water permeable.  Because nothing under there needs pollinating, it can stay put all summer.  I’m still debating on whether I need to cover that again with plastic for these last crazy weeks of winter. 

I can’t wait to start some spinach and lettuces under it, leaving room (if possible) for cauliflower and cabbages.  I got carried away when ordering from Seeds of Italy and ordered a couple of lettuce mixes.  Misticanza di Lattughe has 14 varieties of lettuces of all shapes, textures, and colors and Misticanza di Radicchi has 12 varieties of red and green radiccios and chicories.  I also got Cavolo Broccolo Spigariello aka sprouting broccoli “an iconic vegetable from Naples” that I’m looking forward to trying.

David also had a cattle panel on his handy trailer.  I’ve been wanting to make a tunnel between beds to grow cucumbers up.  The panel is 16′ long and the beds are 4’ apart.  When curved between them it needed some reinforcing to keep the sides straight, so he ended up making a frame out of 2 x 4’s.  I can hardly wait to see it covered in greenery with little cucumbers hanging from it!  Here’s David figuring it out.  I love how it frames the venerable Magnolia in my neighbor’s yard.  

IMG_6917

And I still need to tell you about the Hot Box! 

Fayetteville is one of those places where there are many routes to your destination.  I’ll go out of my way to drive down a street with a house or tree that I like or a garden I’m observing.  A couple of years ago I was driving down one of these streets and they were replacing the windows on a house I like.  After stalking them for several days, I got up my nerve and stopped to ask what they were planning to do with the windows in their refuse pile.  We had a lovely conversation about houses and dogs and gardens and landscaping and several trips later I had a new friend and thirteen lovely old wooden windows.  It is my hope they will ultimately be part of a phenomenal greenhouse, but in the meantime, I wanted to use them to make a cold frame.  Because he’s amazing David surprised me with this one.  I may paint it, or maybe I’ll be patient and wait till the plywood mellows like the rest of the garden structures.  

IMG_6912

I know they’re called cold frames, but for some reason we call ours The Hot Box.  He lined it with Perma R foam board insulation.  We put a thermometer inside and have been monitoring the temperature.  One day when it was sunny in the 60’s here it was 110 degrees inside! 

In their great book “The Four Season Farm” Barbara Damrosch and Eliot Coleman (preeminent garden gurus, especially winter gardens) advise that 75 degrees is as high as you want to let it get inside the box.  They also advise that it is much better to err on the side of too cold.  We’re still trying to figure out the best way to vent ours.  We’re thinking about using chains attached to the fence behind it to raise the windows enough to keep the temperature moderate.  In the meantime it’s 25 degrees here and snowing, so I’m not going to worry about it today. 

On my blissful day in the garden I planted ‘Astro’ arugula, ‘Spring’ Broccoli Raab, ‘Quarantina’ Broccoli Raab, and Claytonia in the hot box. 

Claytonia perfoliata, also known as miner’s lettuce from when it was eaten by miners during the California gold rush, is a super cold-hardy green that is native to western North America.  Those miners ate it to prevent scurvy because it is high in vitamin C.  I couldhave/shouldhave/wouldhave planted it last fall, but I didn’t, so I’m trying it now.  We shall see.  As soon as the leeks sprout, I’ll put them in there too. 

I love having these new structures in my garden.  They expand it in all dimensions.  Into the sky and earlier into the season.  Gaining me space and time.  Cosmic.

FAVA BEANS

IMG_4320

Fava Beans, (Vicia faba) aka Broad Beans, involve you in a labor of love.  They have a short season, are hard to find, expensive when you do find them, and are laborious to prepare, but I adore them so I grow my own.  I admire the way their pods are lined with fluffy white batting, like some precious gift sent through the mail.  I love their nutty, creamy, texture and the way they taste like fresh green sustenance after a cold brown winter.  I love to pair them with their fellow spring compatriots – peas, asparagus, artichokes, mint, and arugula – in a salad or pasta.  If eating that crew doesn’t make you feel alive, I can’t help you.  They’re great in a frittata or mixed with goat cheese as a dip for crudites.  I don’t mind the work it takes to get to that meaty morsel, it’s meditative, and if I serve them to you, it’s because I love you.  In the garden they are lovely plants.  Easy to grow and fairly unaffected by insects with handsome black and white flowers like they have somewhere fancy to be.

IMG_4746

You can even eat the leaves in a salad.  The flowers attract bees and other pollinators and as a member of the legume family they fix nitrogen leaving the soil better than they found it.  They are an ancient crop, believed to have been part of the Mediterranean diet since 6,000 B.C.  They are a great source of lean protein with no saturated fat or cholesterol, are high in dietary fiber and folate, and contain a number of minerals including iron, copper, manganese, calcium, and magnesium.  And on the off chance you have too many, they also freeze well.

IMG_6958

I’m growing two varieties this year; “Aquadulce”, a Spanish heirloom with large white beans and “Broad Windsor”, and old English favorite and the variety I grew last year.

I get a lot of inspiration from British gardening sources.  My all time favorite garden magazine is BBC Gardens Illustrated and I love to watch Jaime Oliver’s show “At Home” online and pause it to lust after his gorgeous kitchen garden.  A while ago I came across a video of a British gentleman planting fava beans in what he called “loo” rolls.  (I love how it sounds like Lou Rawls, and so much better than toilet paper rolls.)  I began collecting loo rolls myself.  They are the perfect container for starting fava beans as they’re deep enough to allow a nice root system to develop and they’re biodegradable so the whole thing can be planted causing no root disturbance.  With a little forethought, they’re readily available.

IMG_6949

 I found an inexpensive plastic bin at Home Depot, lined them up in it, and filled them with planting mix.  (I made a funnel with some rolled up paper which helped.)

IMG_6953

I soaked my fava beans in water overnight, popped one into each container with the dark eye facing downwards, made sure they were buried to a depth about twice their size, topped them up if they needed it, and watered them in.  I’ve also been saving my half and half containers to make plant labels.  I clean them out, cut off the top and bottom, slice open one side and cut them into strips.  They are somewhat waterproof and can be inscribed with a Sharpie.  

IMG_6966

They should germinate in 8-10 days.  Last year I direct seeded mine on March 15th. 

IMG_4661

Here they are (above) on April 26, 2014.  

IMG_4751

And again on May 23rd with potatoes above them, swiss chard below, and “Calypso” bush beans just coming on in front of them.  I hope by starting them a little earlier this year and growing two kinds, I’ll get to enjoy even more of them.

It should be noted that ingesting fava beans and even inhaling their pollen can trigger a hereditary disease, known as favism, in susceptible people of Mediterranean descent.  If you’re curious, you can find a lot more information regarding this online.

And by the way, the leeks I planted last week have germinated!  I promptly removed the plastic wrap and have put them where they can soak up some sun.  I’ll keep you posted!